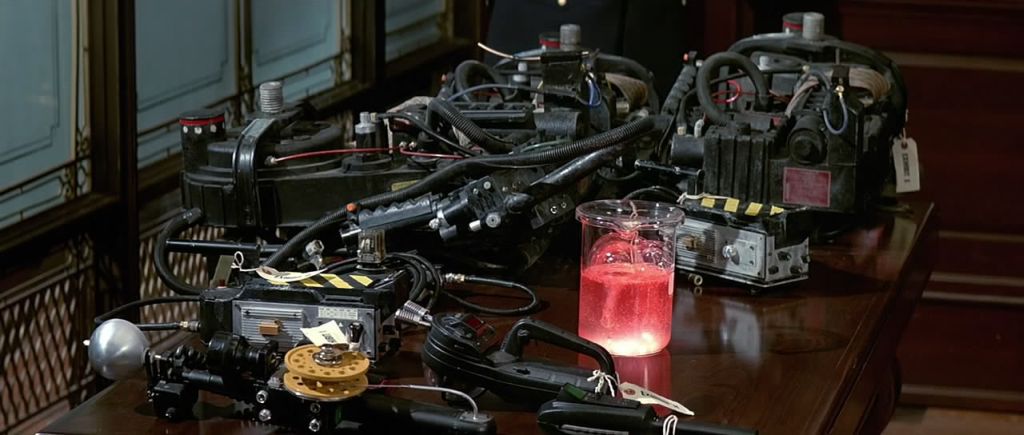
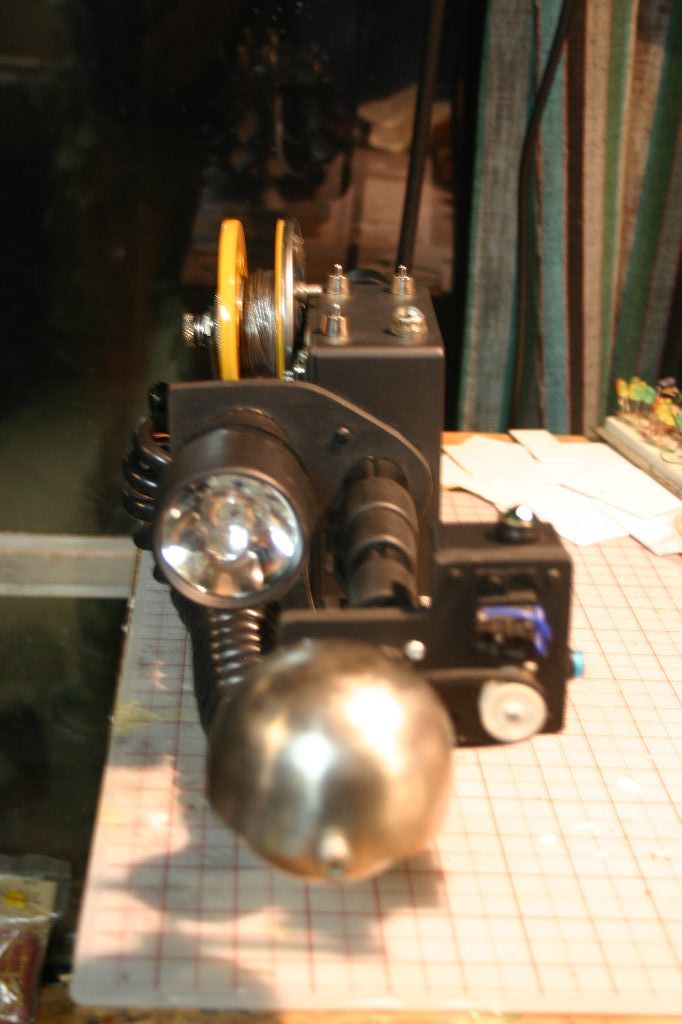
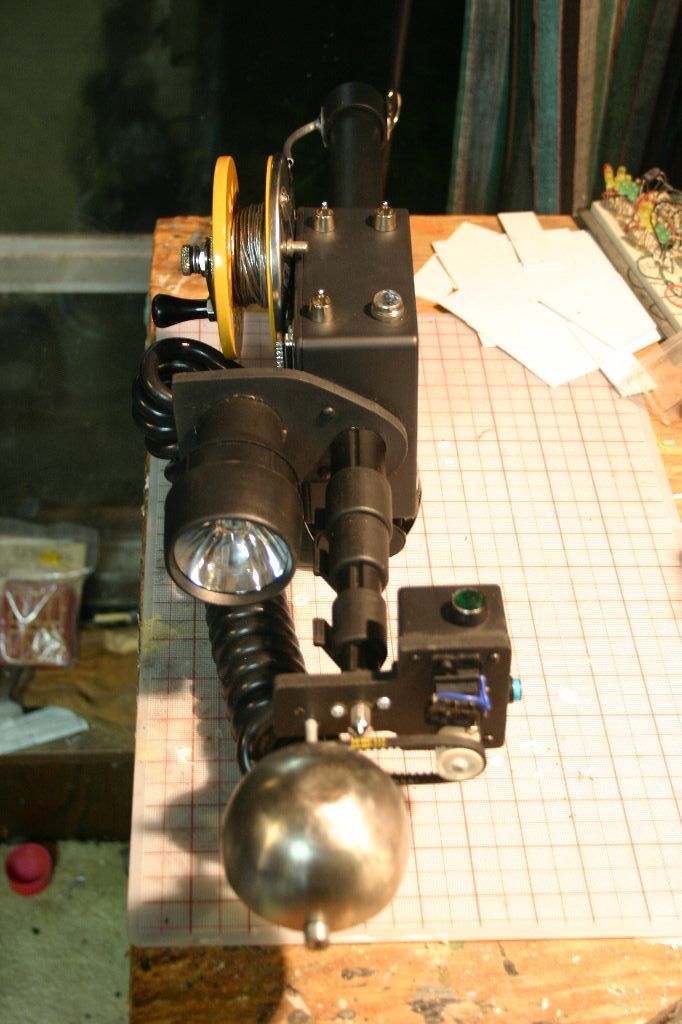
GB 2 Slime Scoop
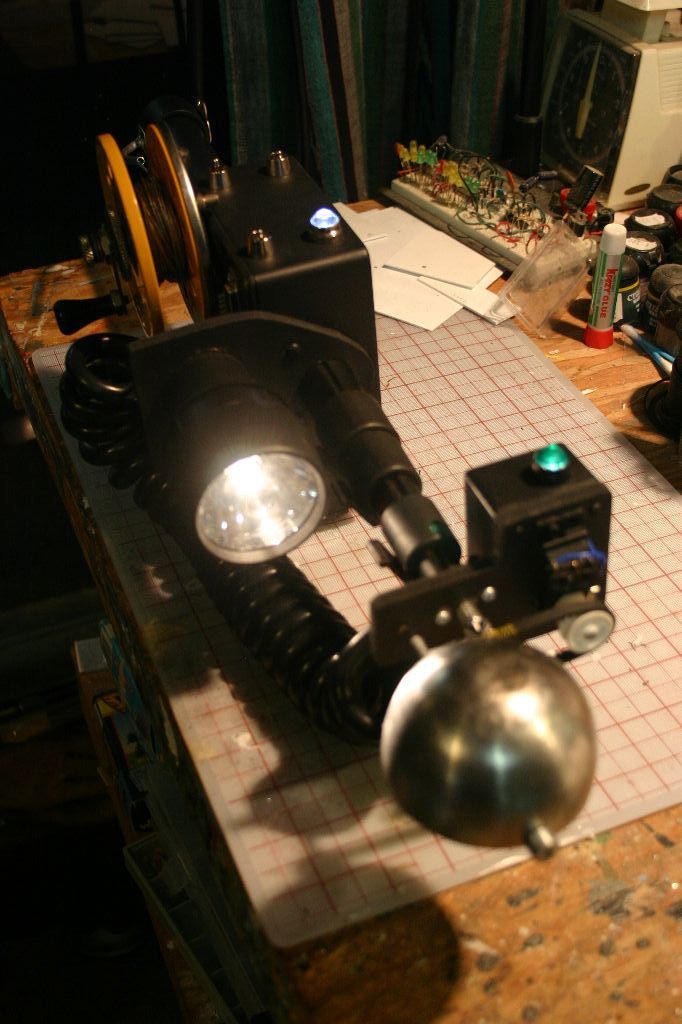
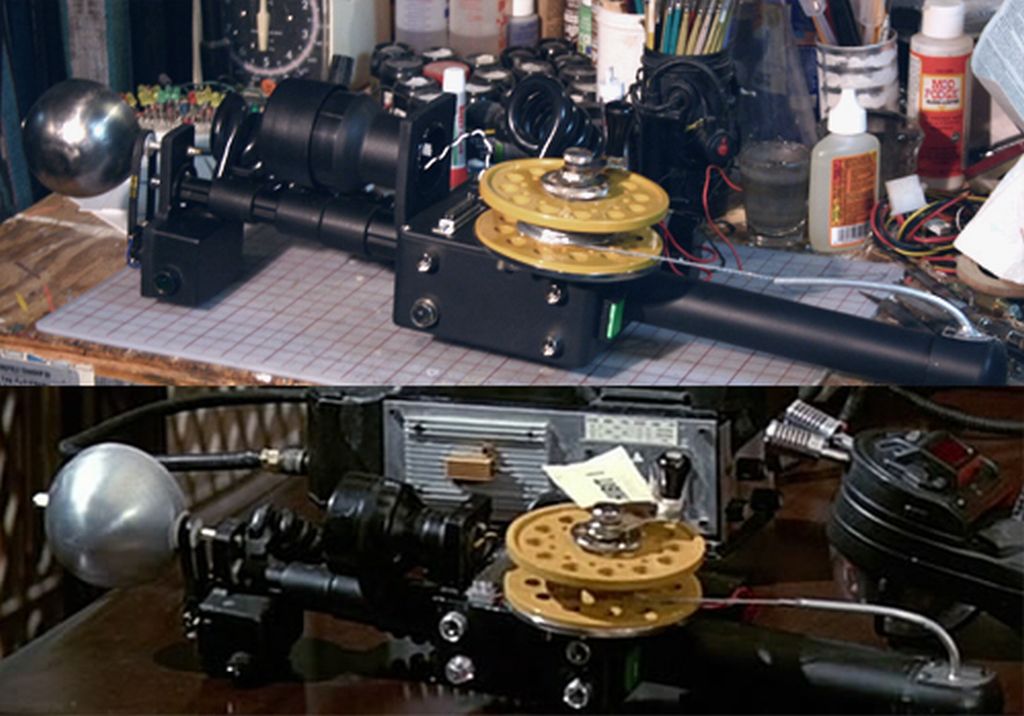
After making the KUD Meter and Liberty Controller I figured I'd continue my collection of obscure Ghostbusters 2 props with the mechanical scoop Ray uses to take a sample from the slime river:

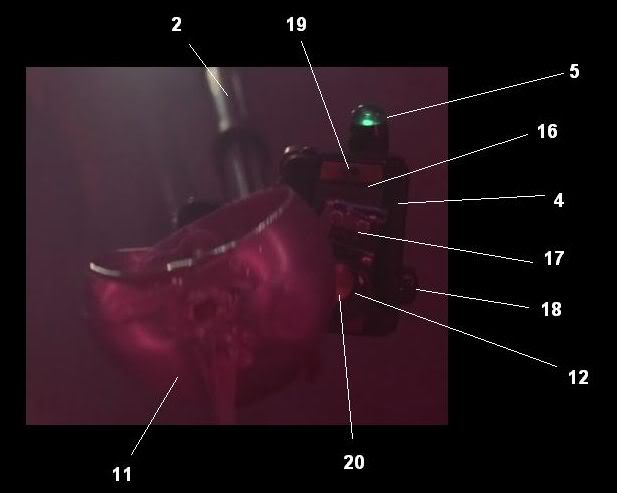
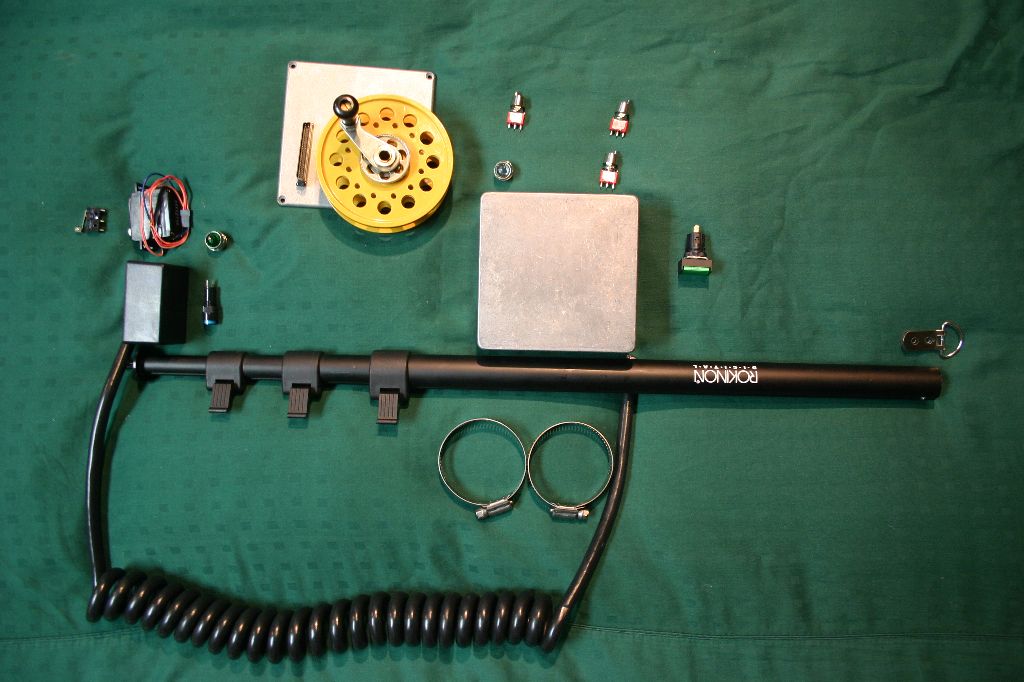
As far as I can tell no one else has attempted an accurate replica of this prop. Aside from the fact that it's an obscure prop from a genre movie, the total lack of any reference outside of what's shown in the movie makes it difficult to research. I managed to find an HD copy of Ghostbusters 2 and proceeded to screencap every frame that the scoop shows up in. After staring at them for way too long and poking around the internet I managed to work out this list of parts:
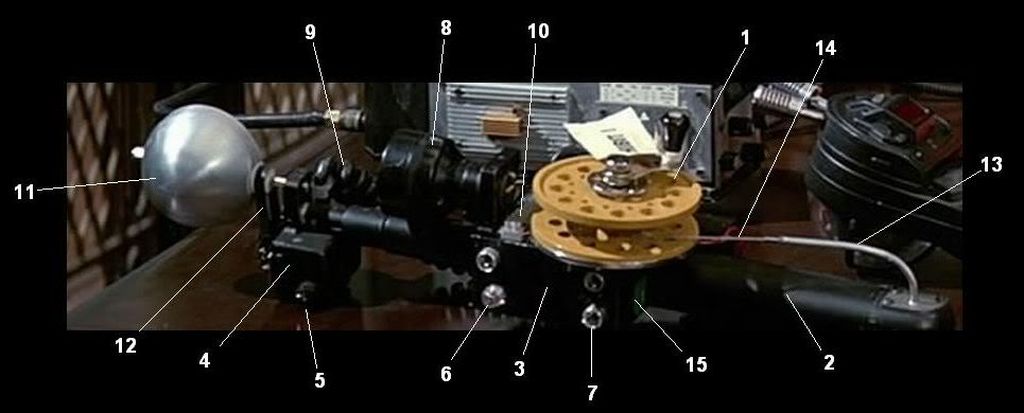
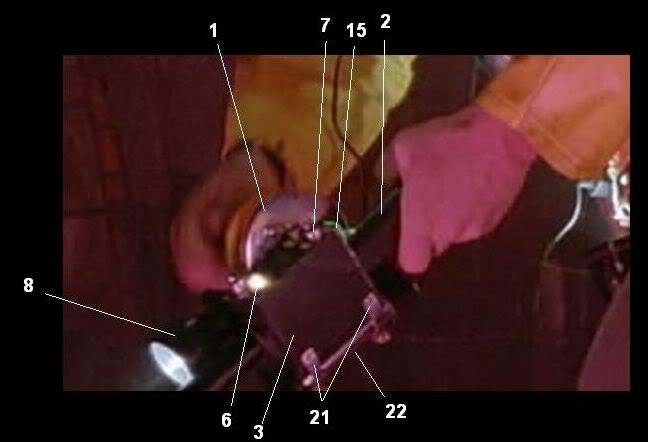
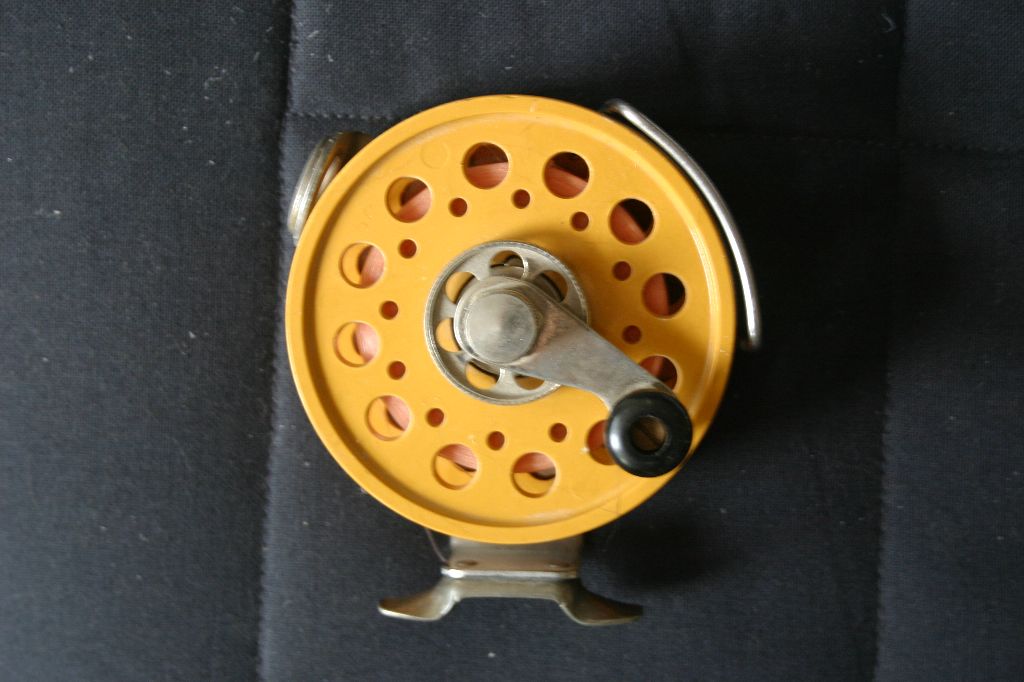
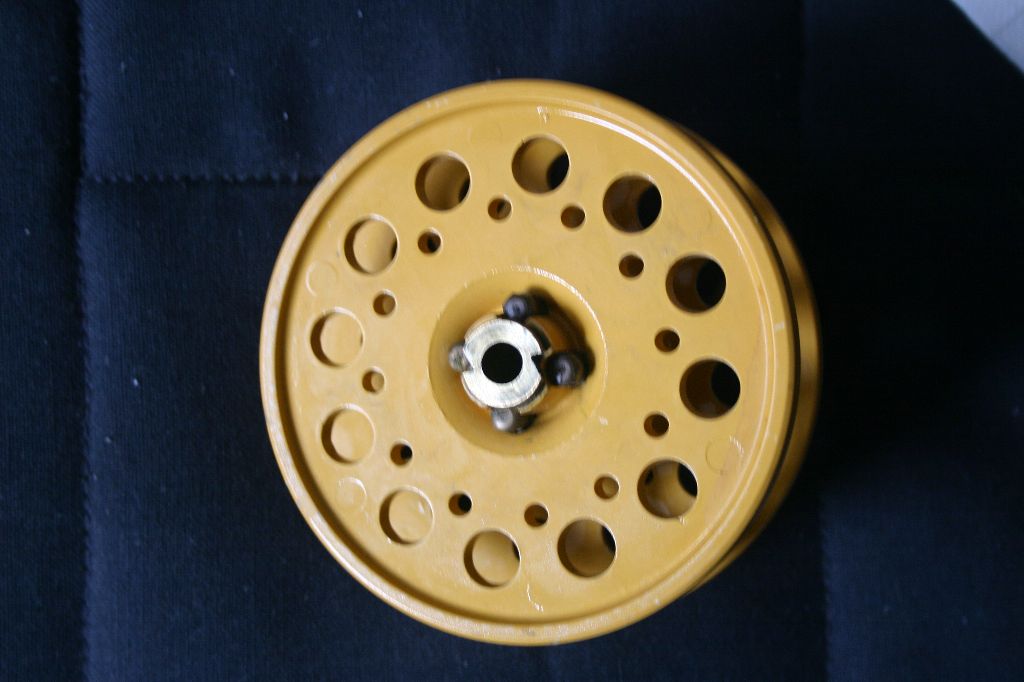
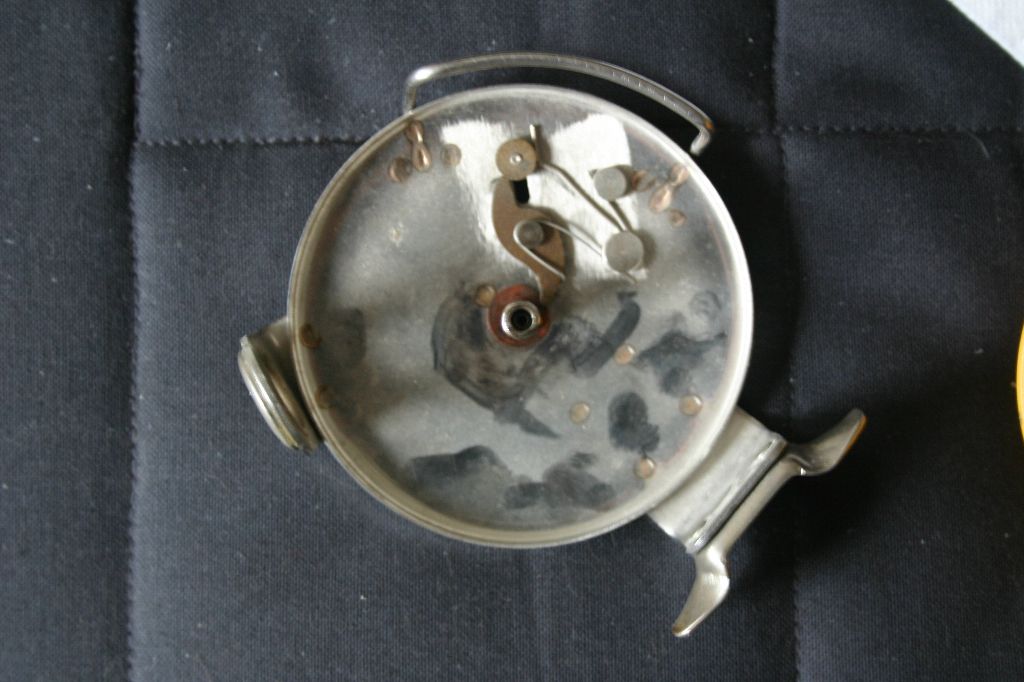
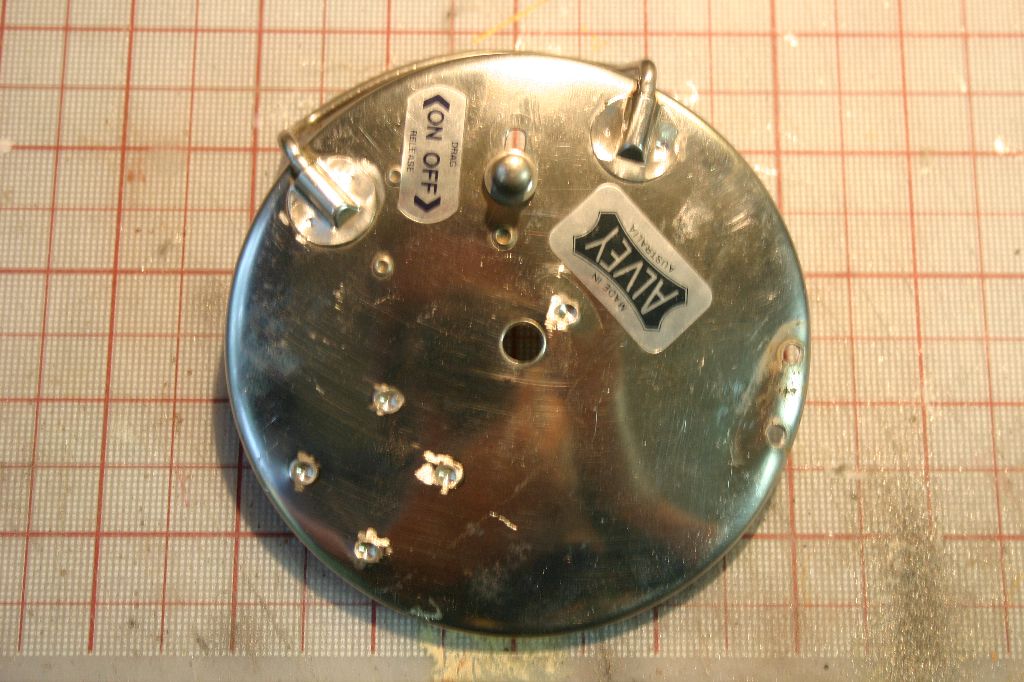
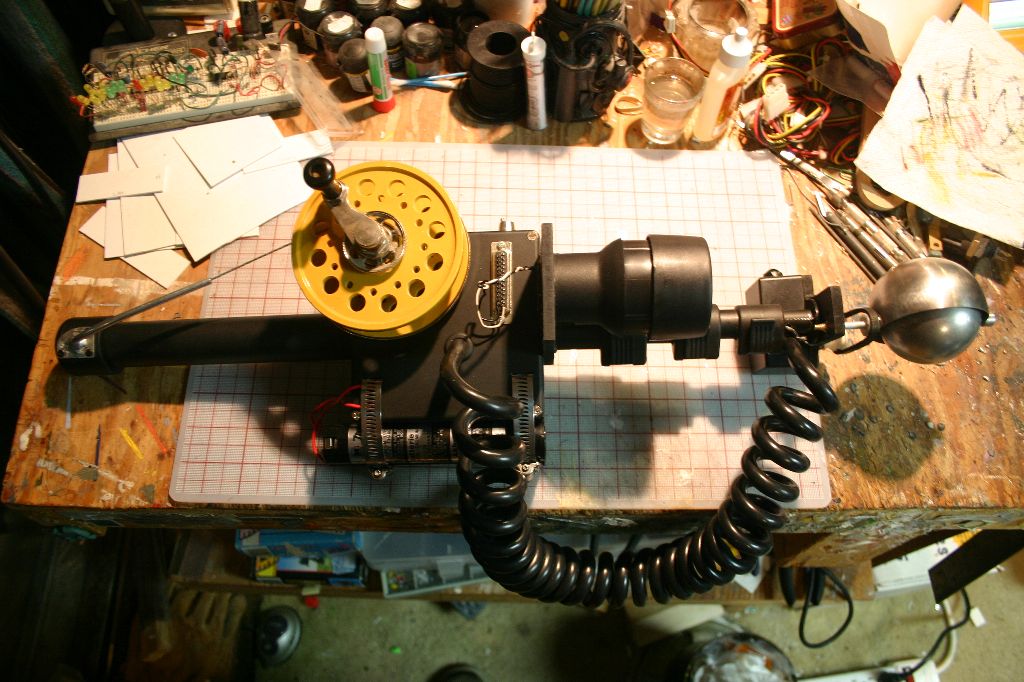
- Alvey Australia Model 425SWF saltwater fishing reel
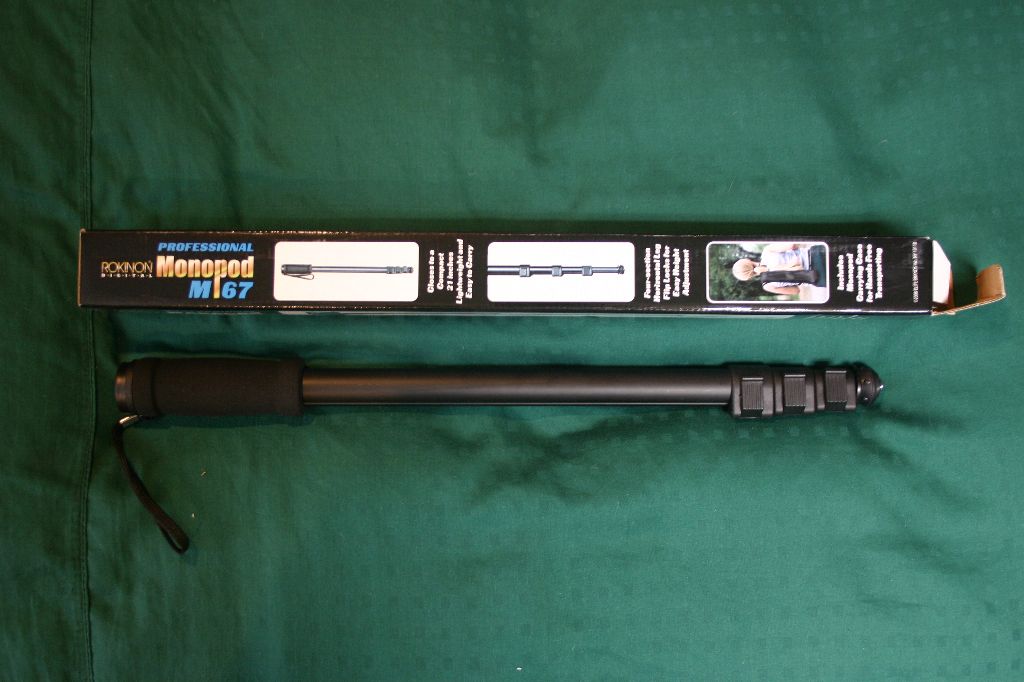
- Promaster 1100 four section monopod, approximately 20" long closed
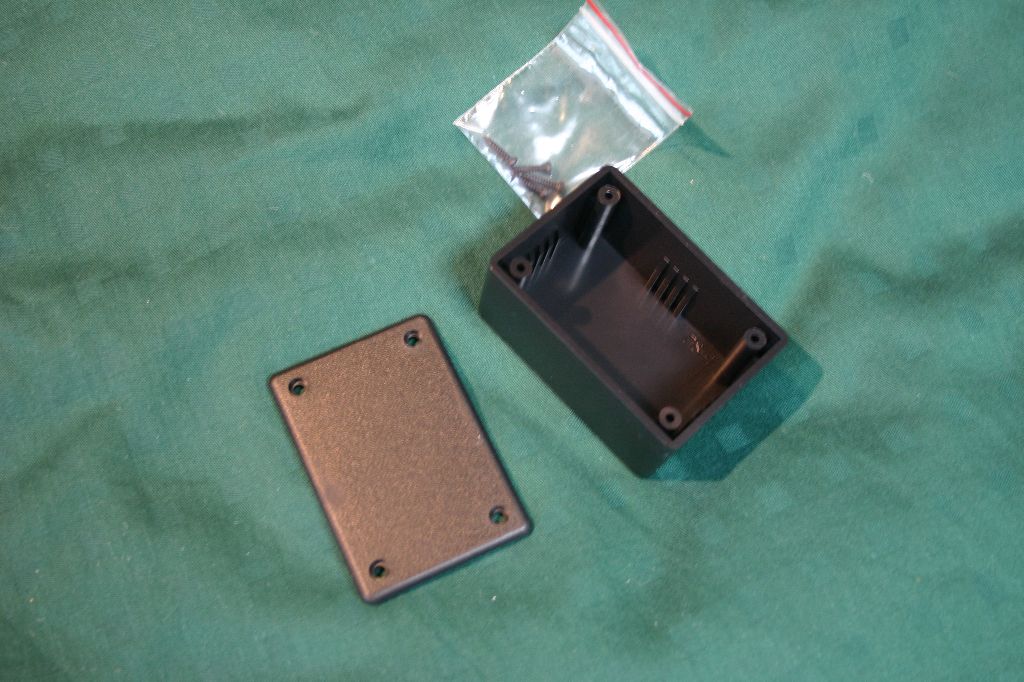
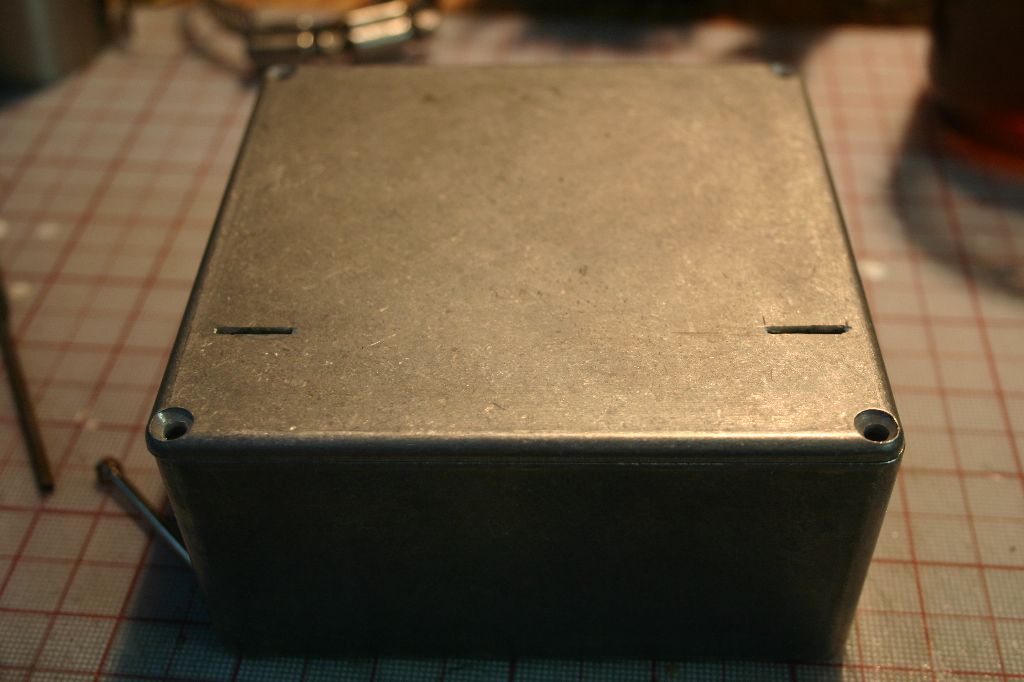
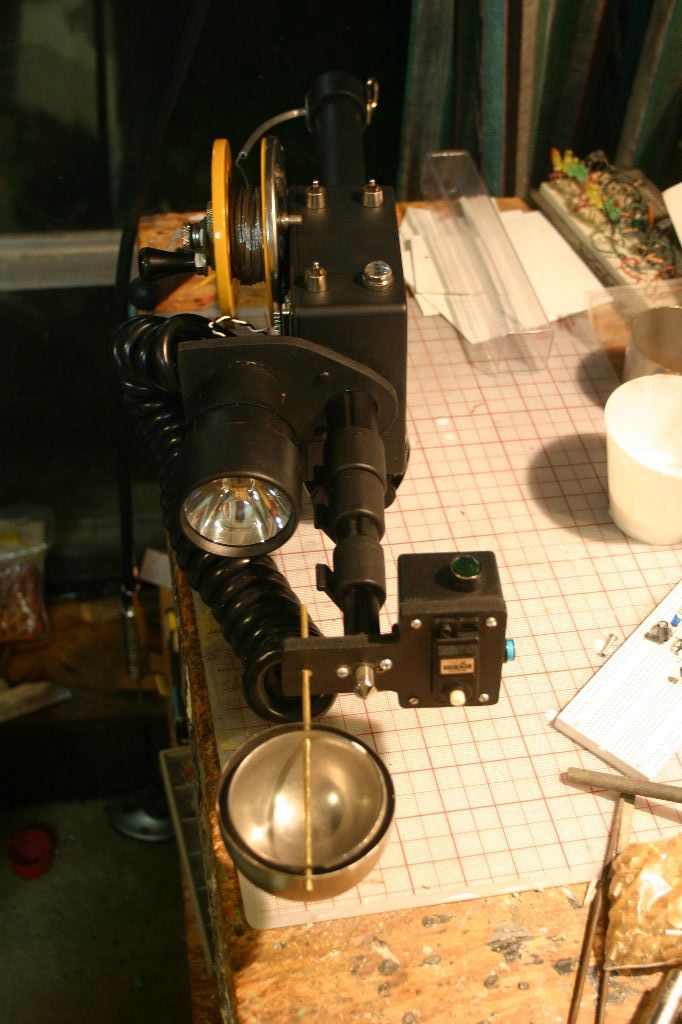
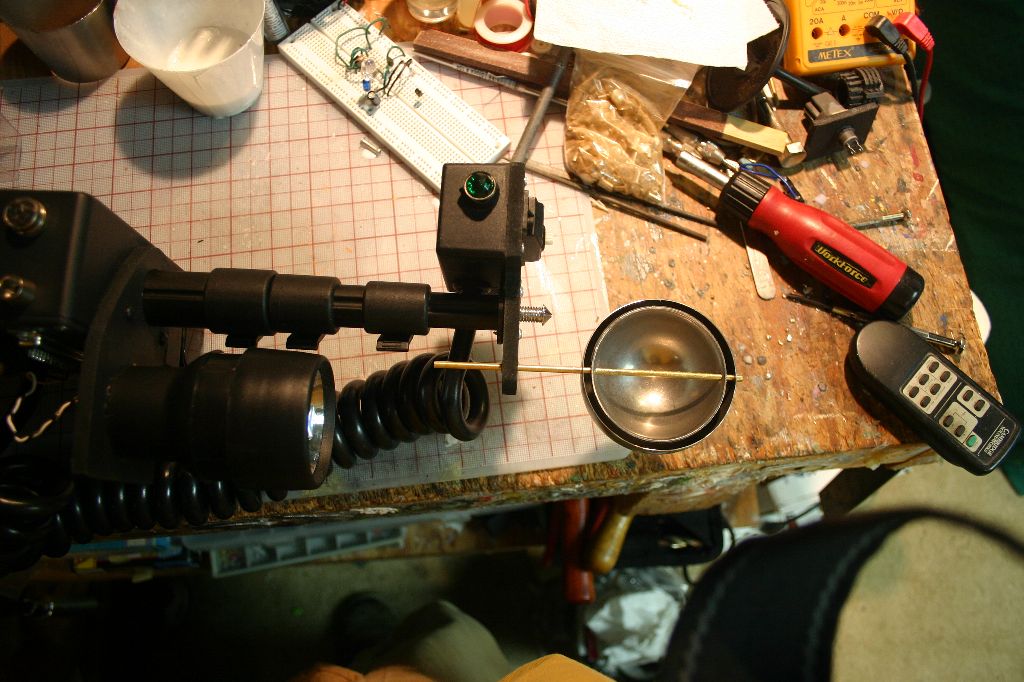
- Hammond project box, 1590U
- Plastic project box
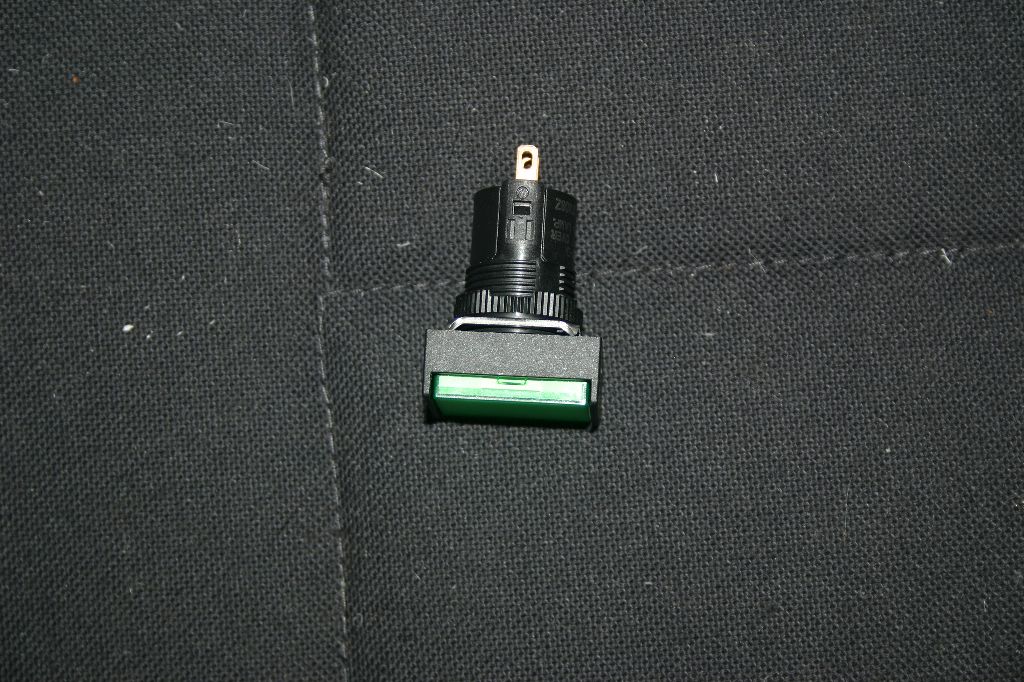
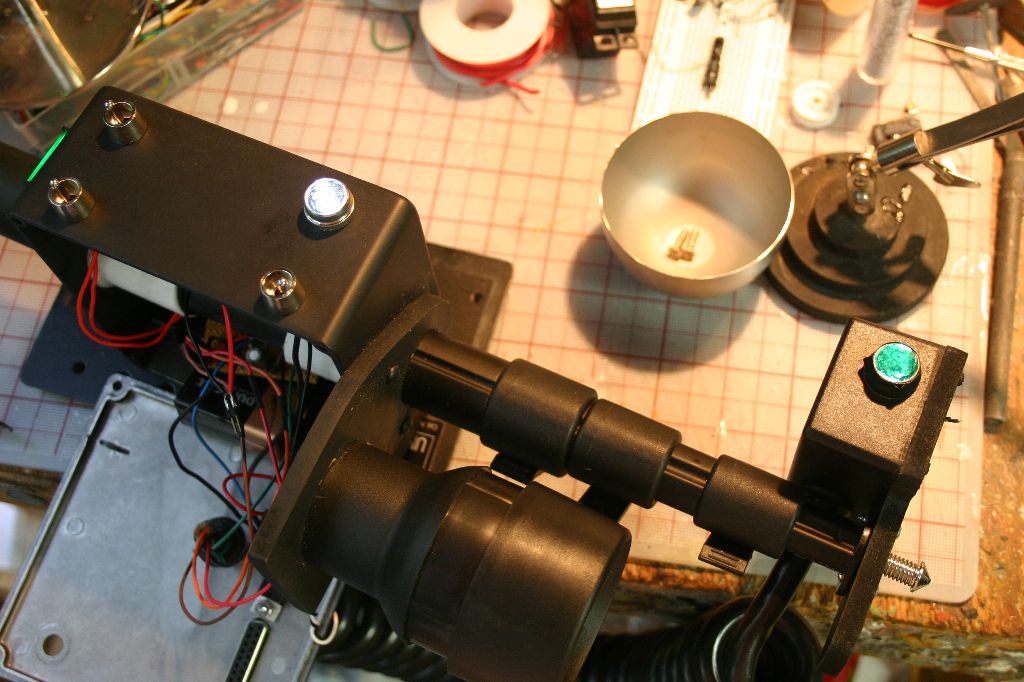
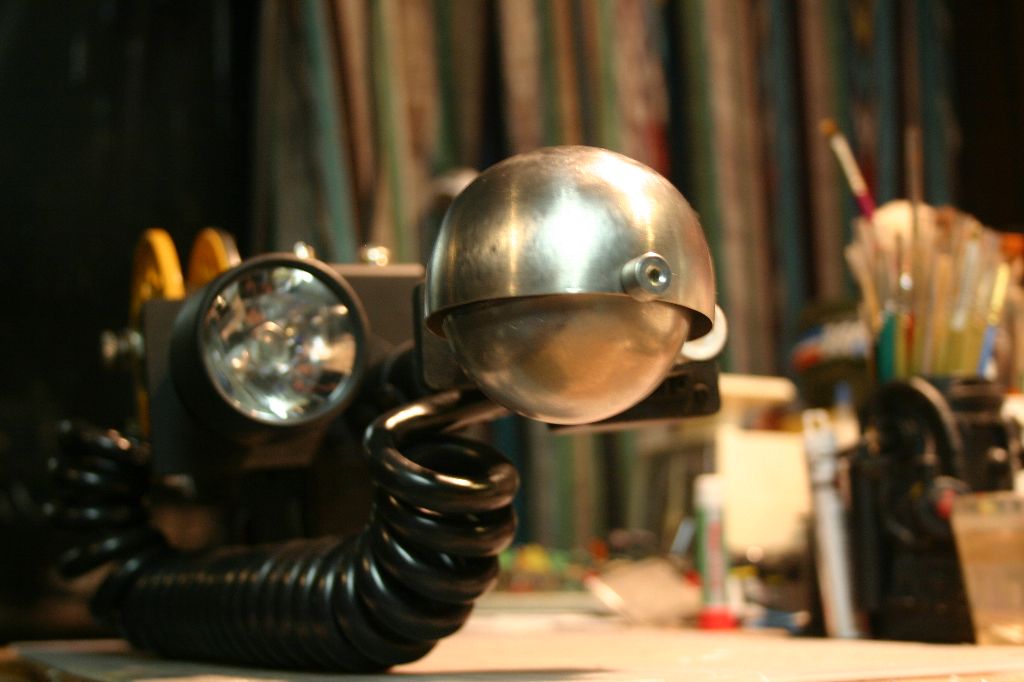
- Green Fender jewel panel light
- White Fender jewel panel light
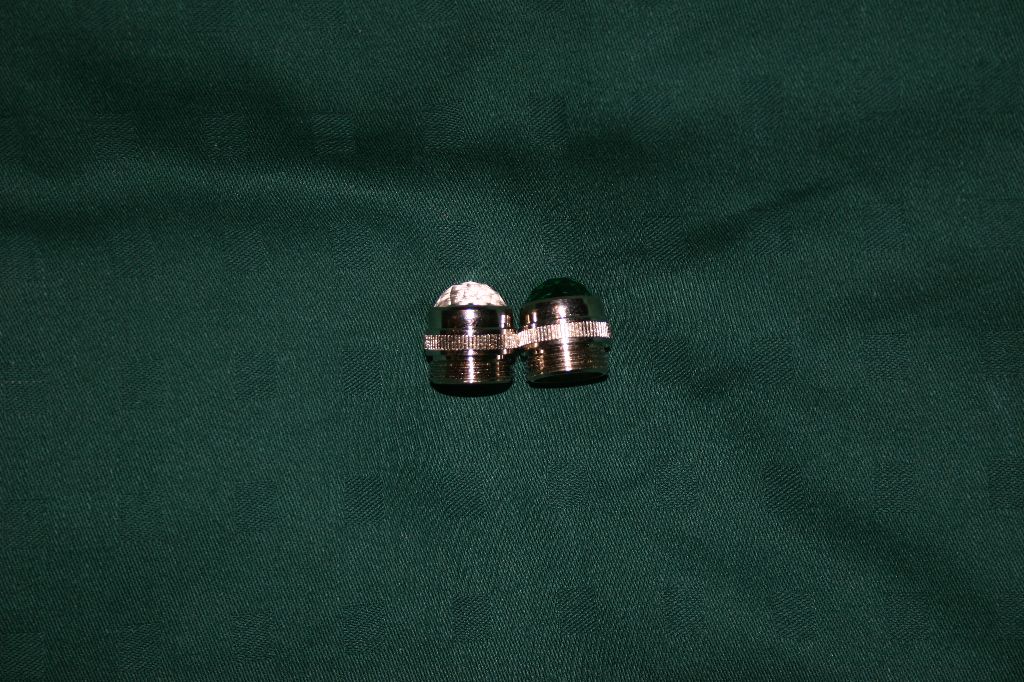
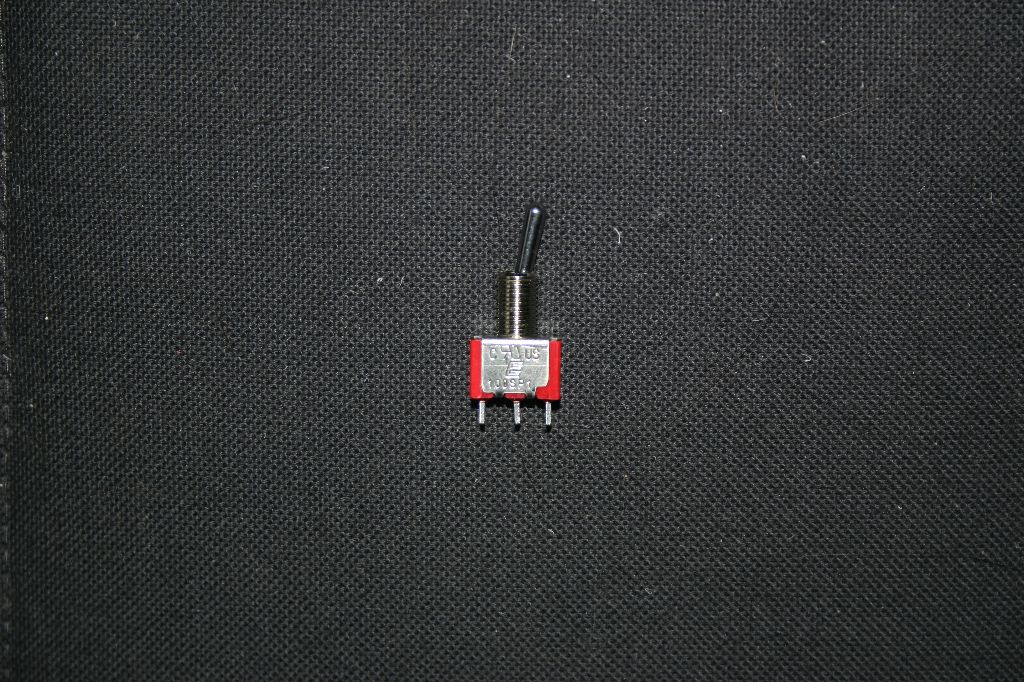
- Toggle Switches with Dress Nuts
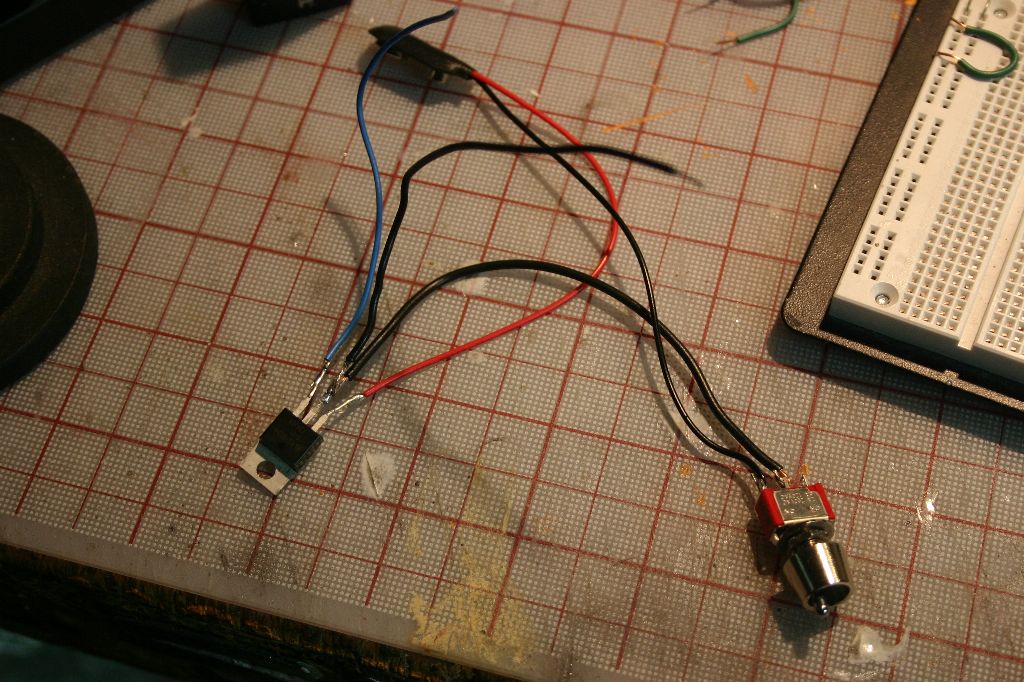
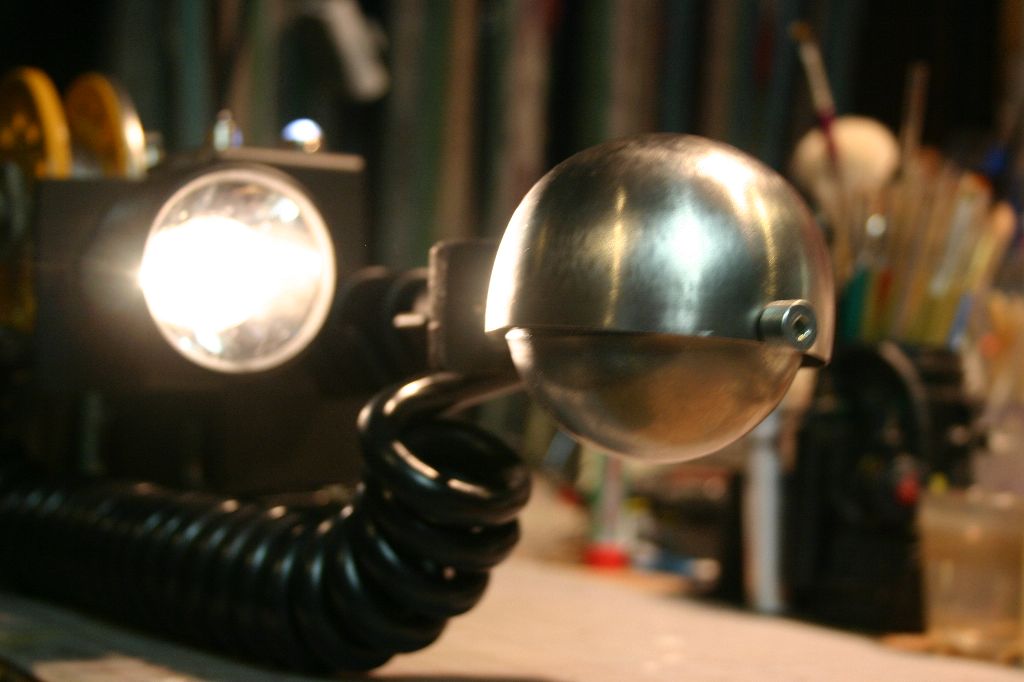
- Flashlight w/ white and black twisted wire coming out
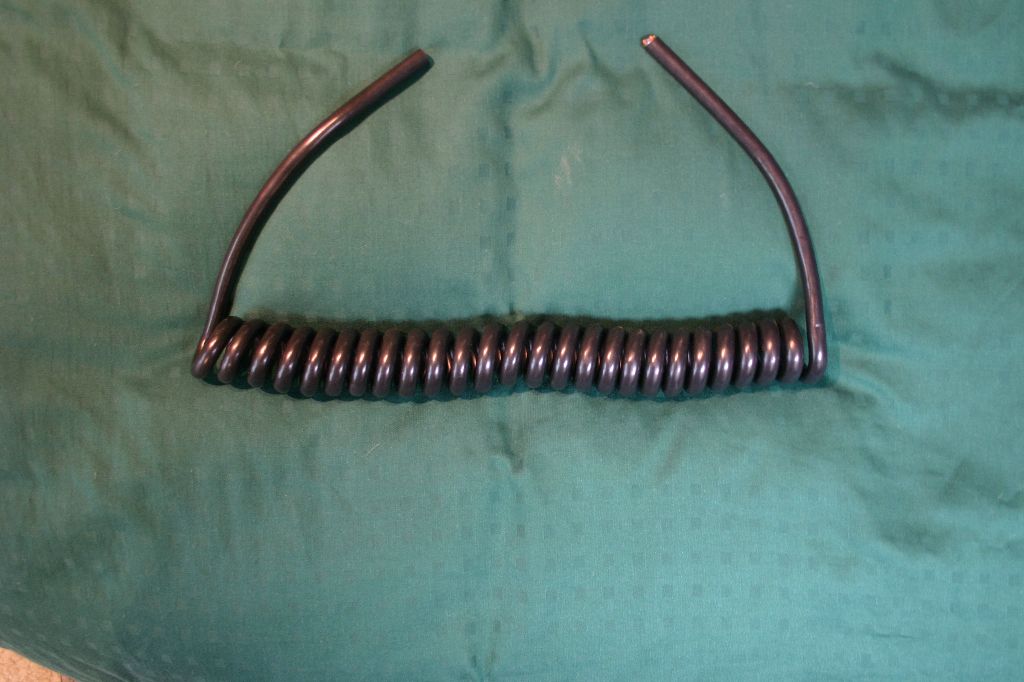
- Coiled wire
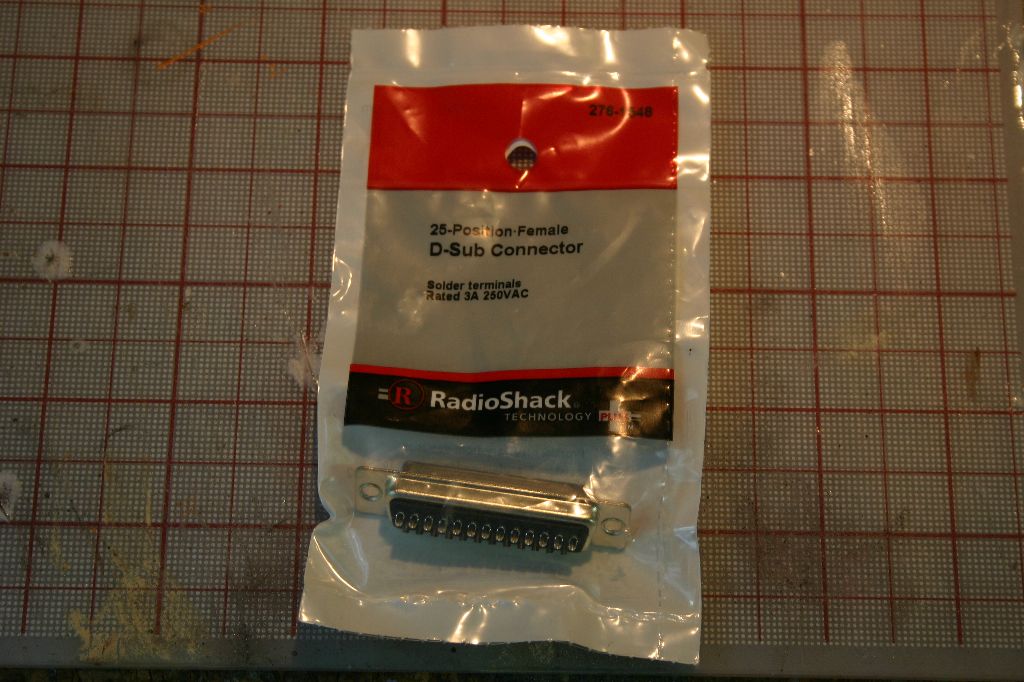
- DB25 serial port connector
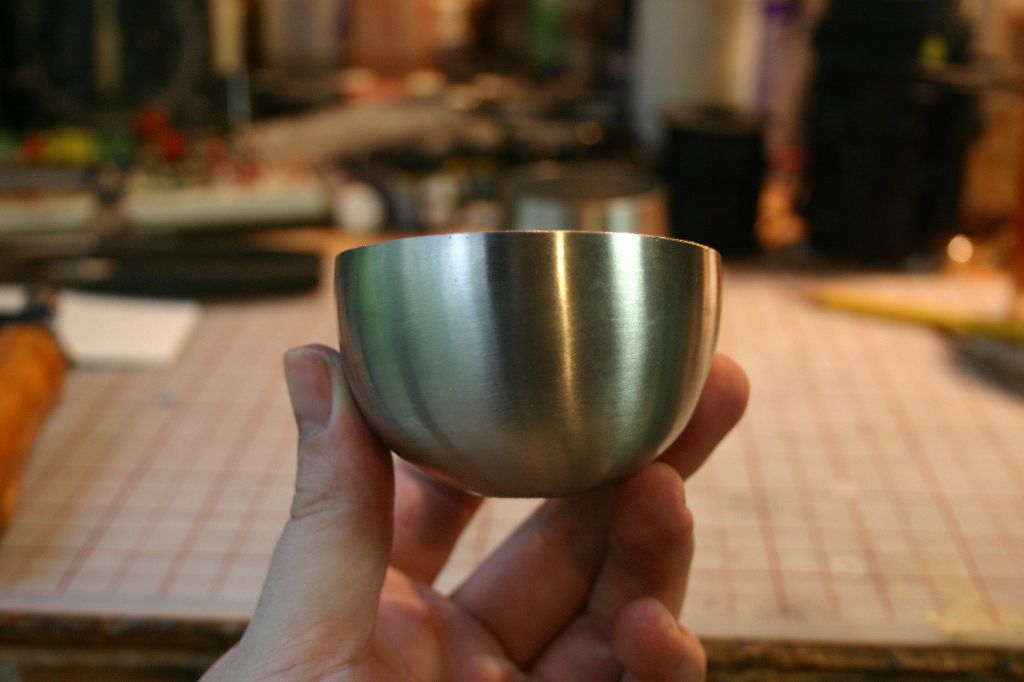
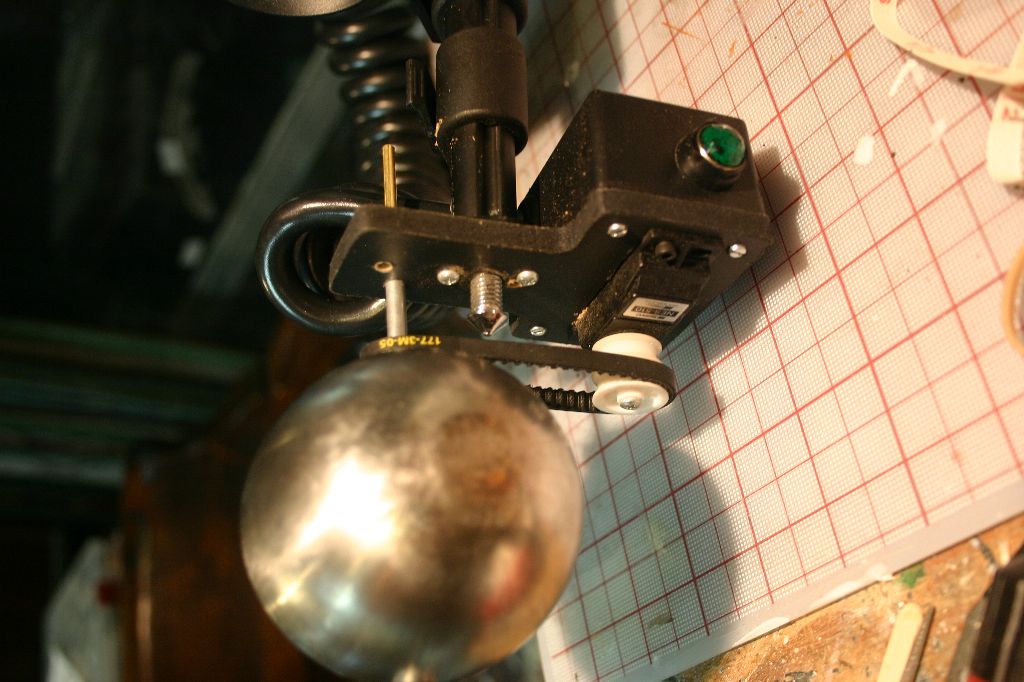
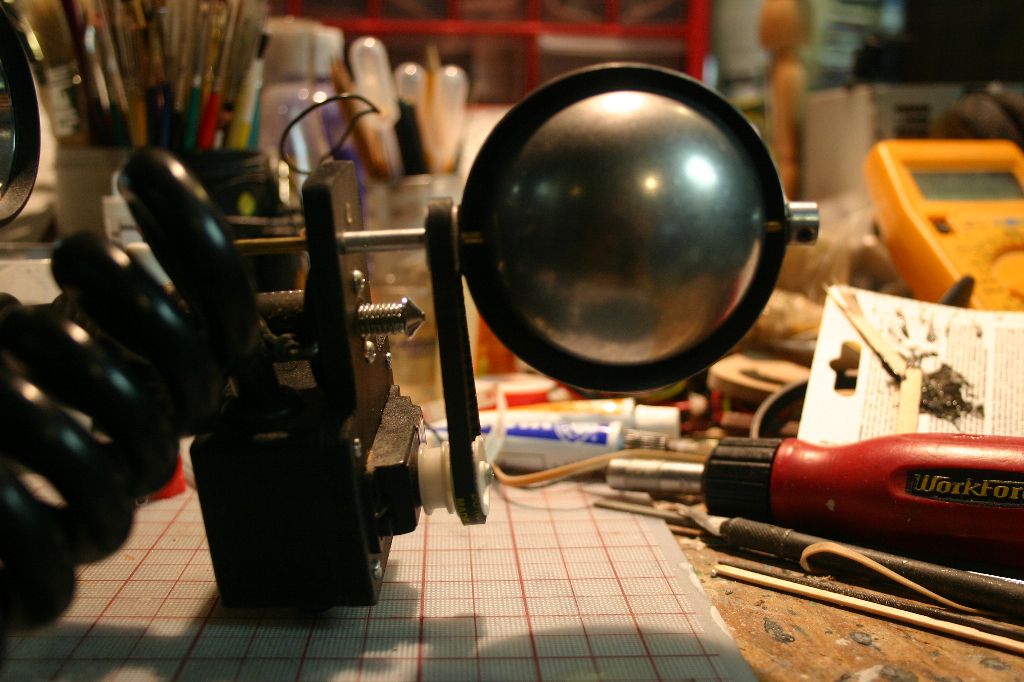
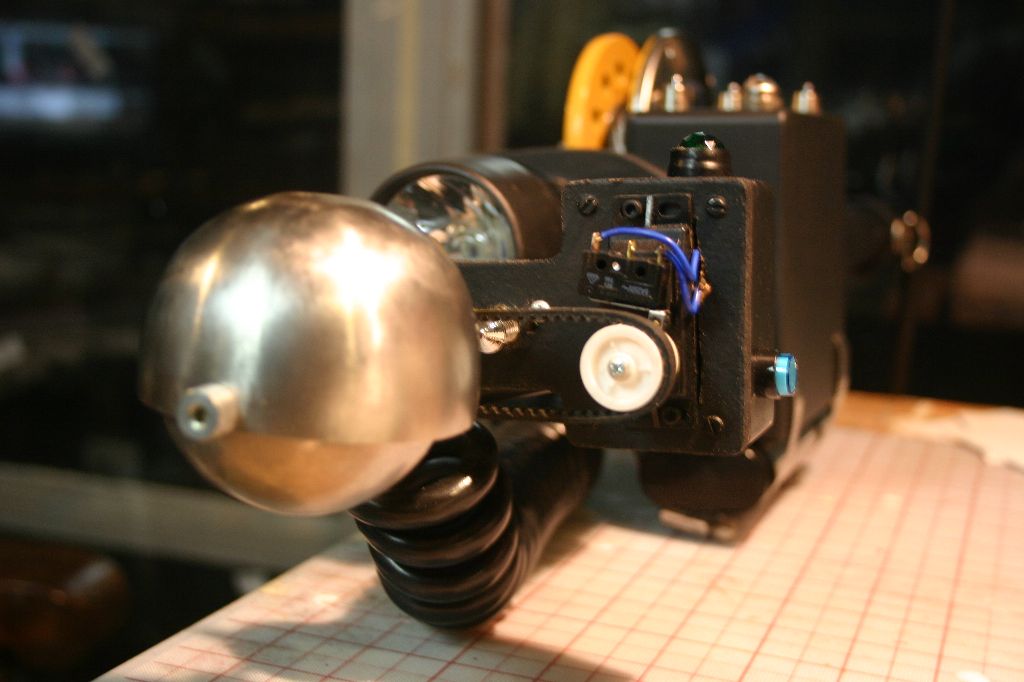
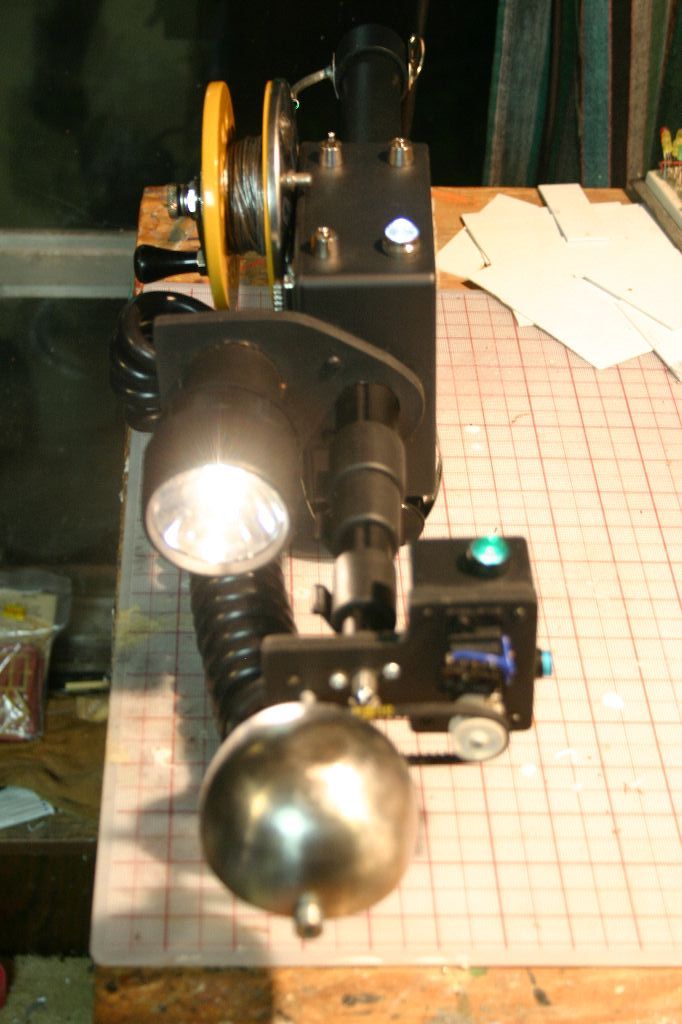
- Aluminum hemispheres, approximately 3.5" diameter external
- Belt Drive
- Aluminum tube
- Steel wire
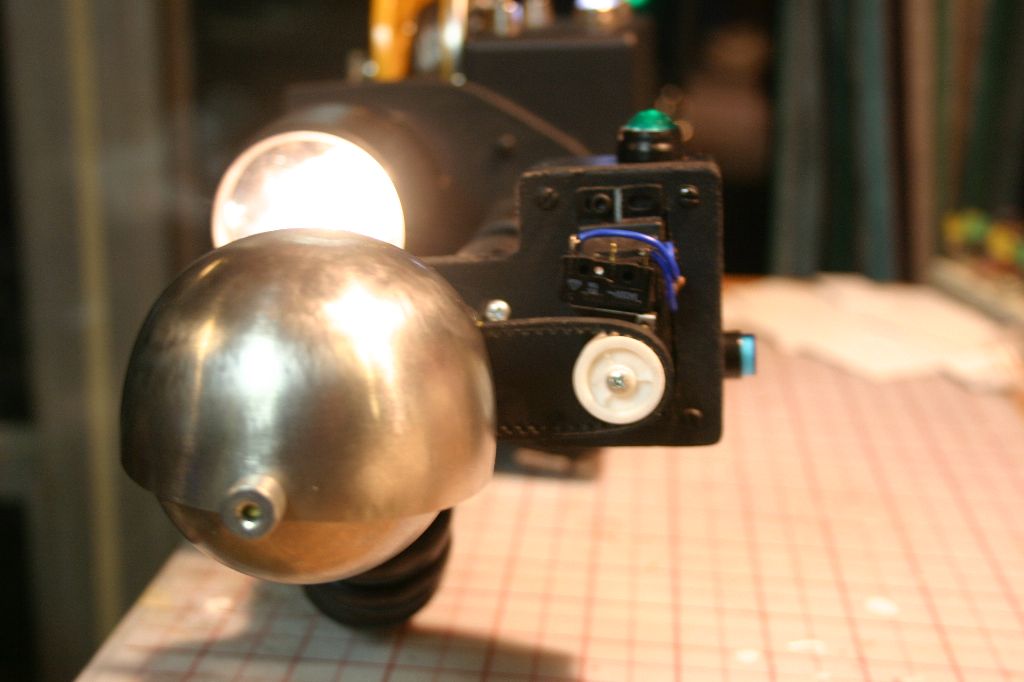
- Green illuminated indicator, possibly a switch w/ white writing
- Hobby servo, adapted for continuous rotation
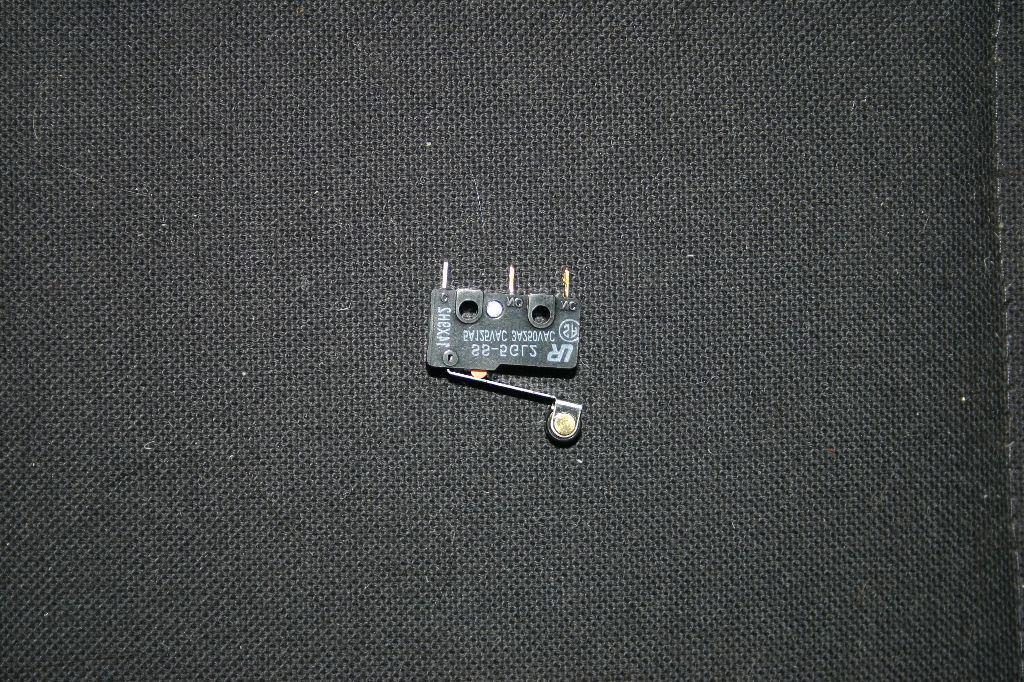
- Micro roller switch w/ blue wires leading into box
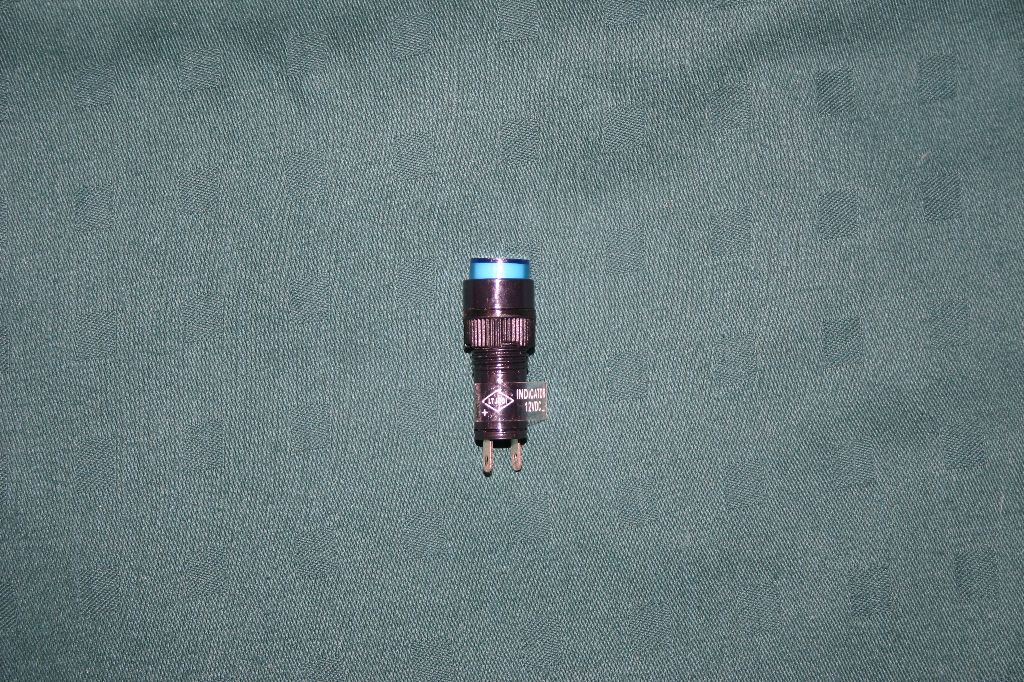
- Blue indicator light
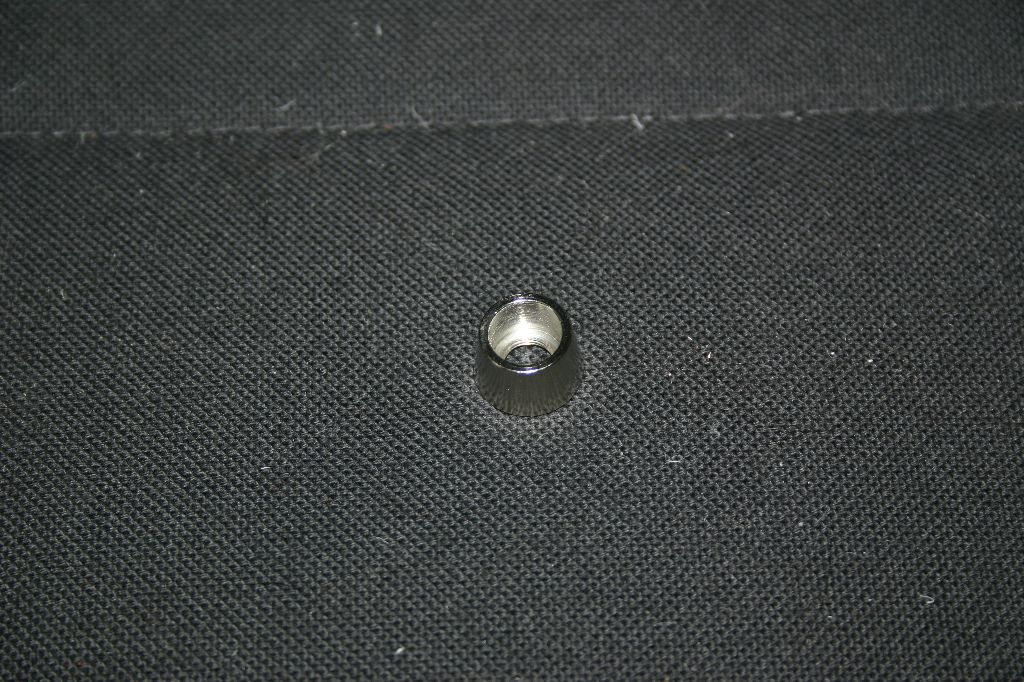
- Hex head socket screw
- Brass disk, possibly part of a tension system for the belt drive
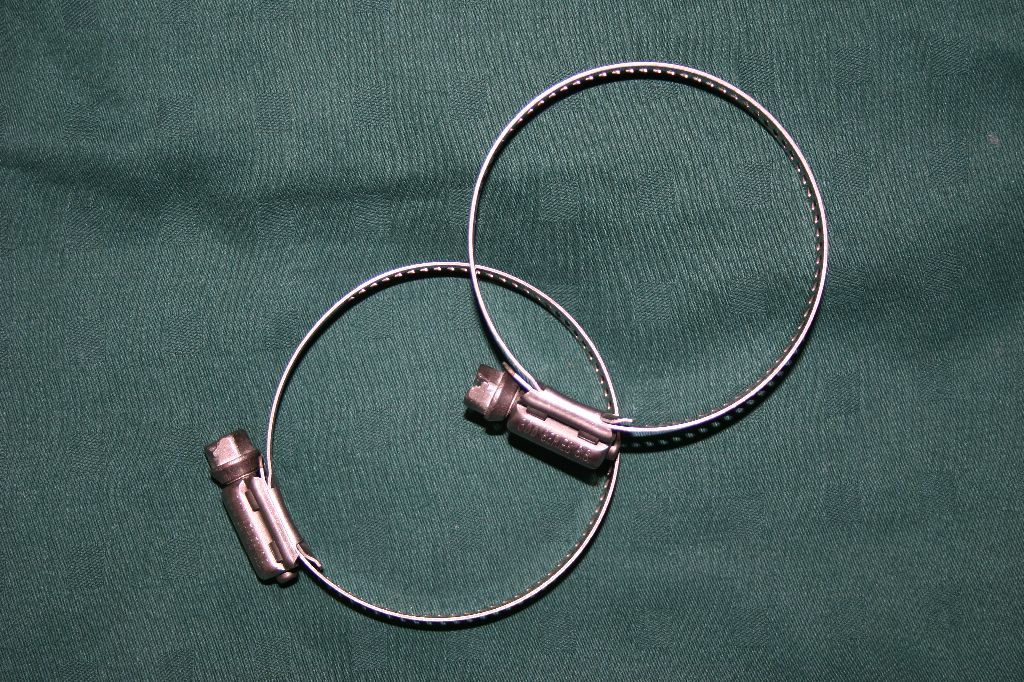
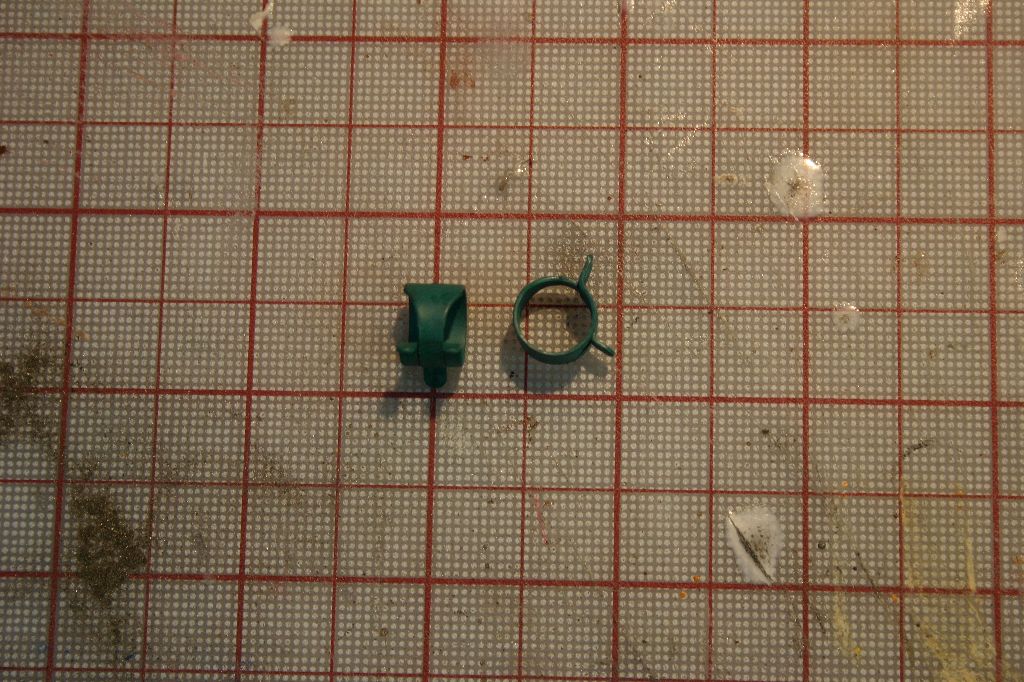
- Hose clamps
- 7.2V Makita NiCad rechargeable battery w/ red wire attached
- (not shown) D-ring attached to handle opposite wire tube.
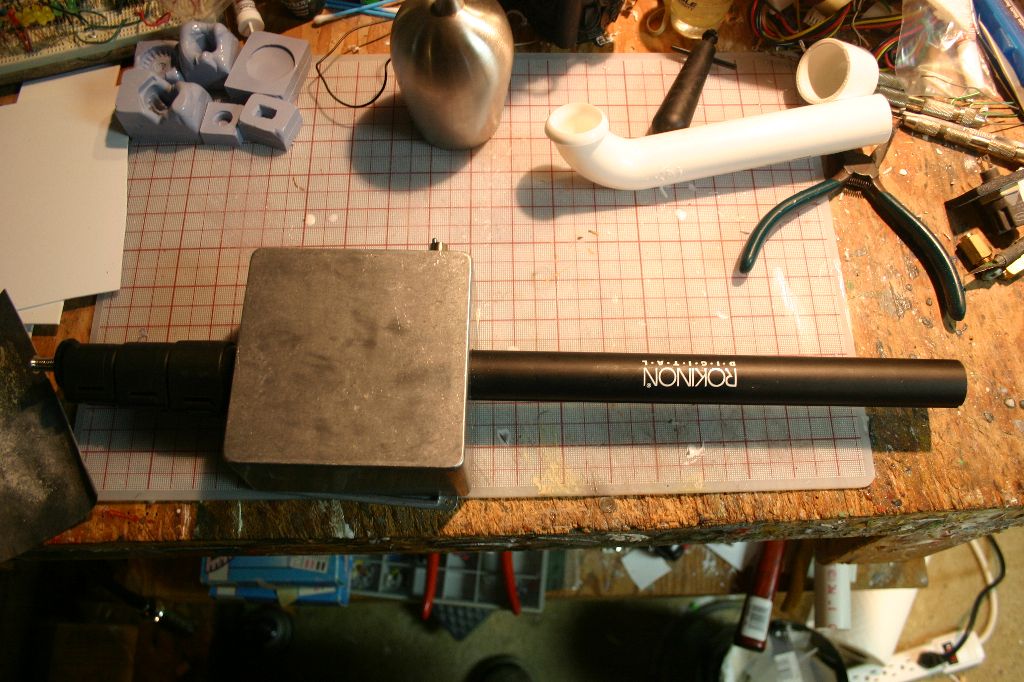
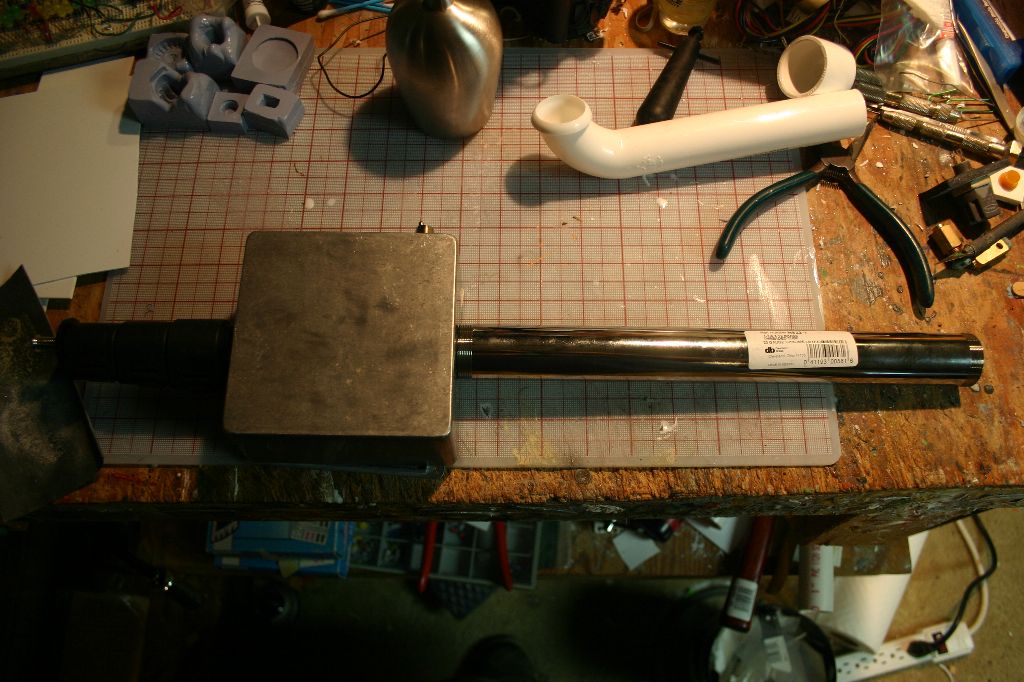
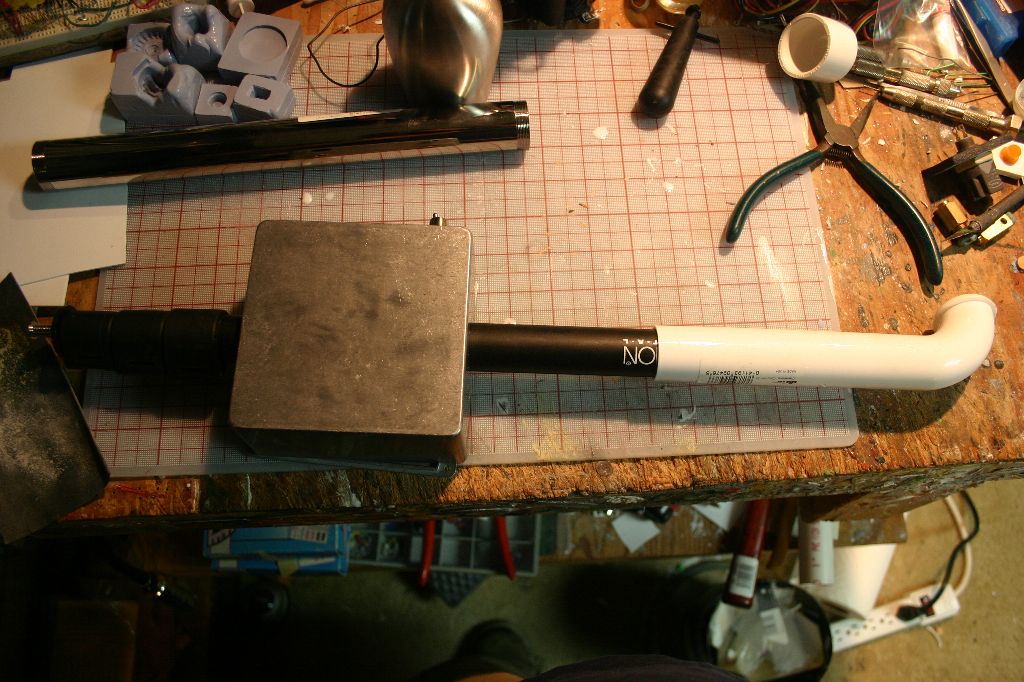
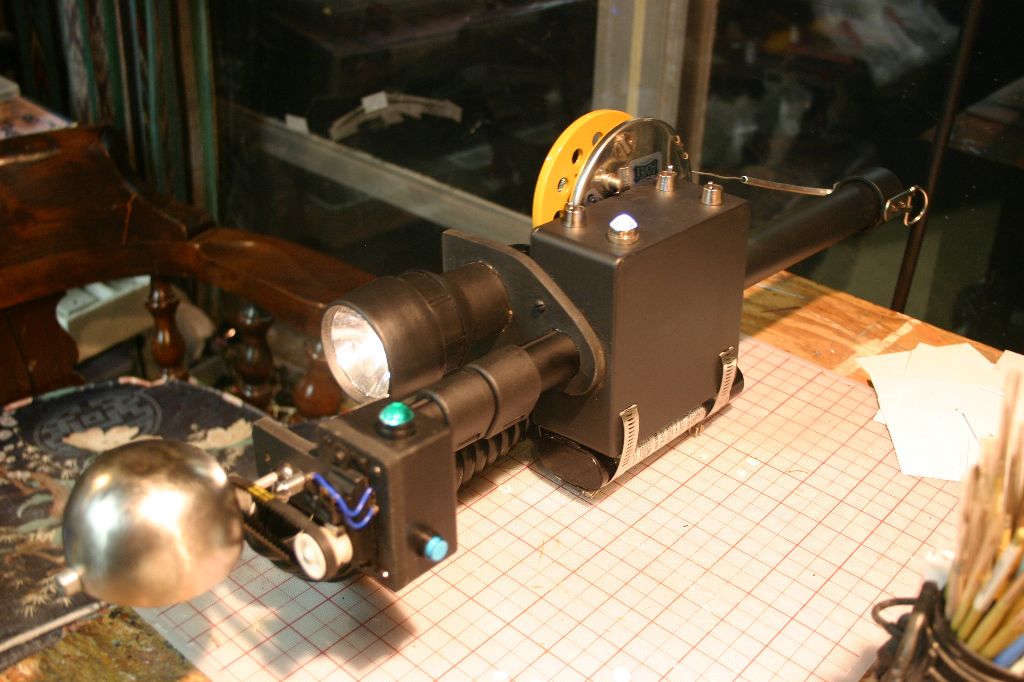
These are all just what I came up with. Some things are accurate, others are only as close as I could find. Here are some shots of the parts as I got them:


Having so little in the way of definite parts I wound up buying a few different versions of things and laying them out to check the look. Eventually I got enough parts that looked right to move forward with the build.
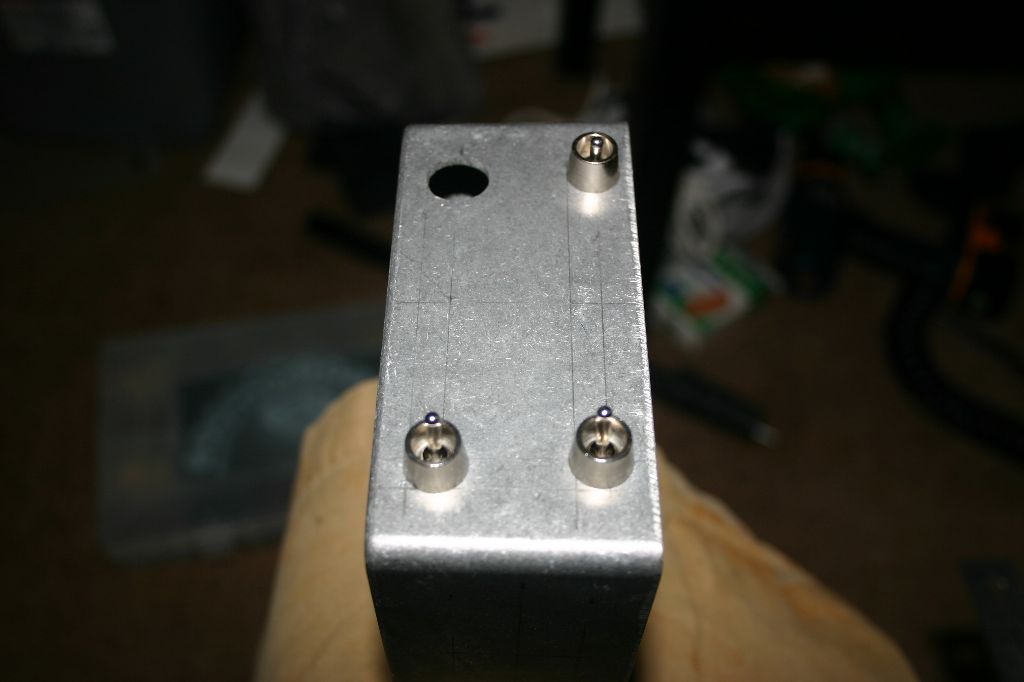
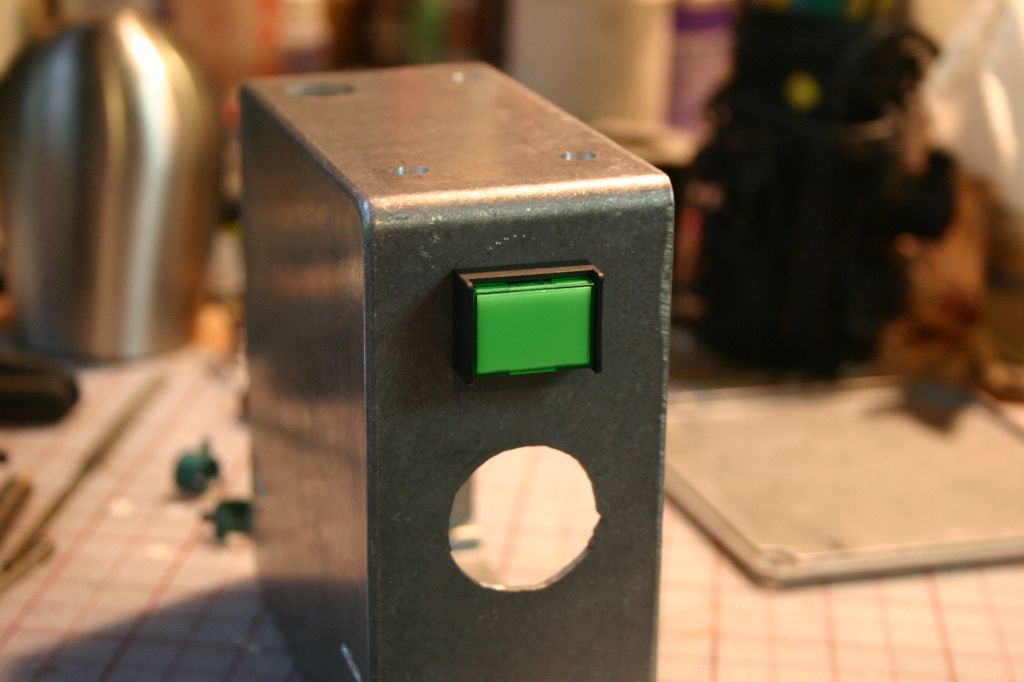
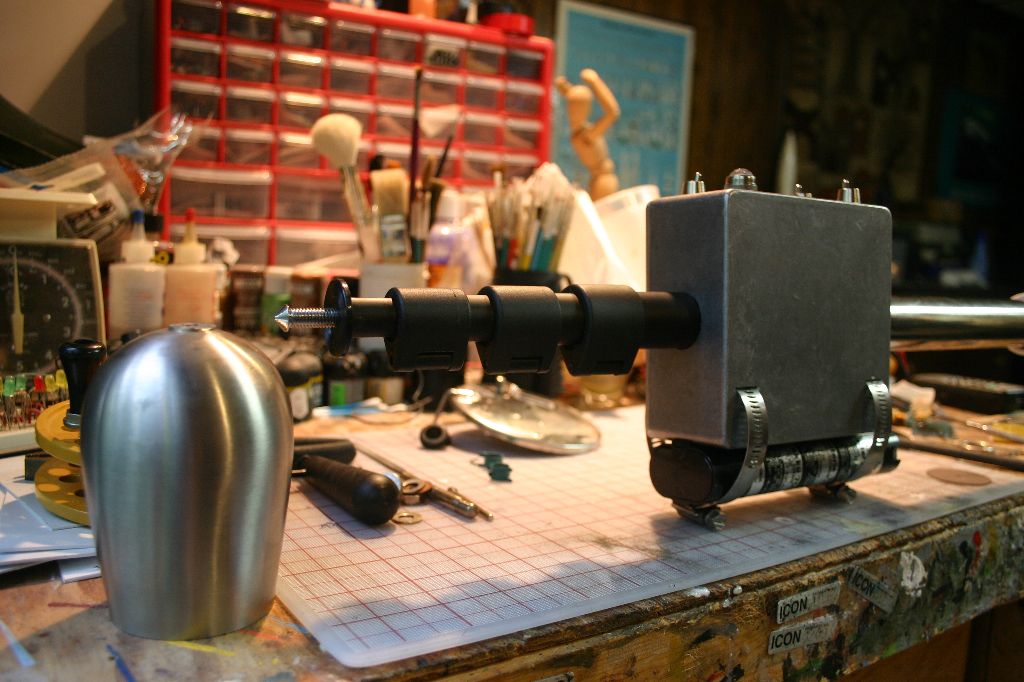
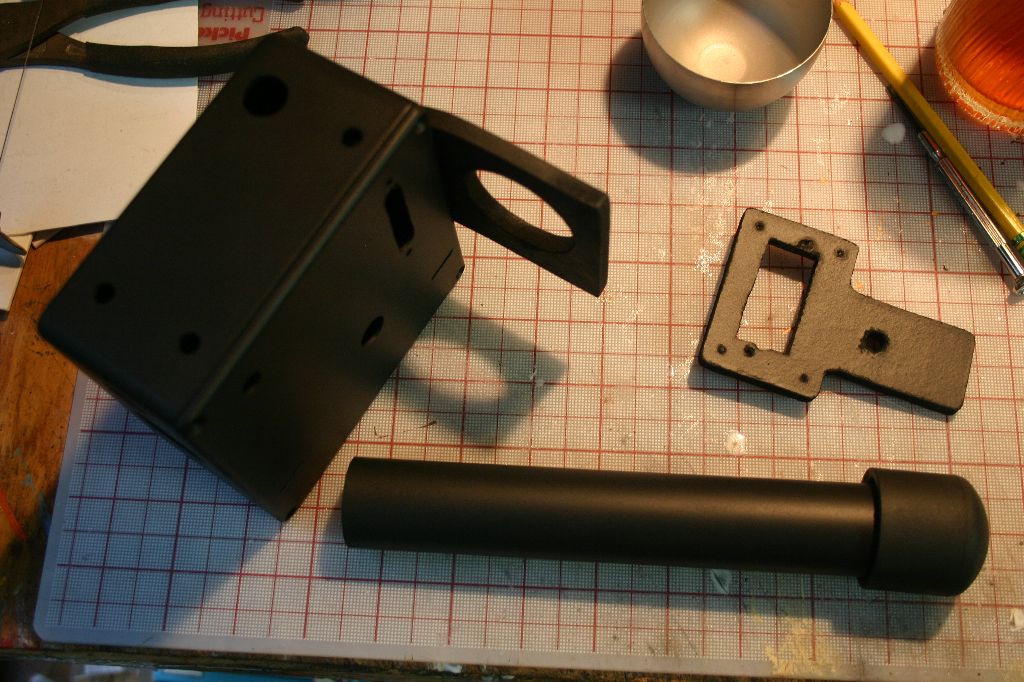
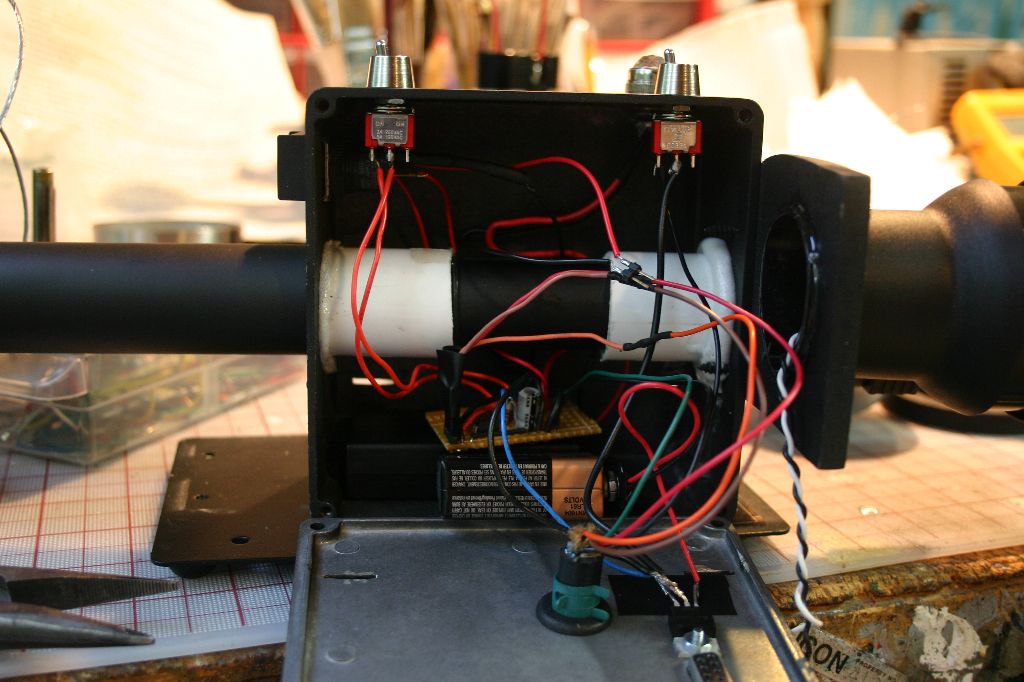
I started with the main box. I used a drill press, a dremel and some needle files to cut all the holes needed.

The reel came apart easily but when I went to remove the extraneous parts from the backing plate I ran into problems. All the parts are spot welded onto the plate. I didn't want to damage the plate too much so I wound up using a dremel to grind down the welds from the outside and pop the parts off. It's not as clean as I'd have liked, I didn't get all the parts off and I have no idea how they did it for the movie but it's close enough that I'll live with it.
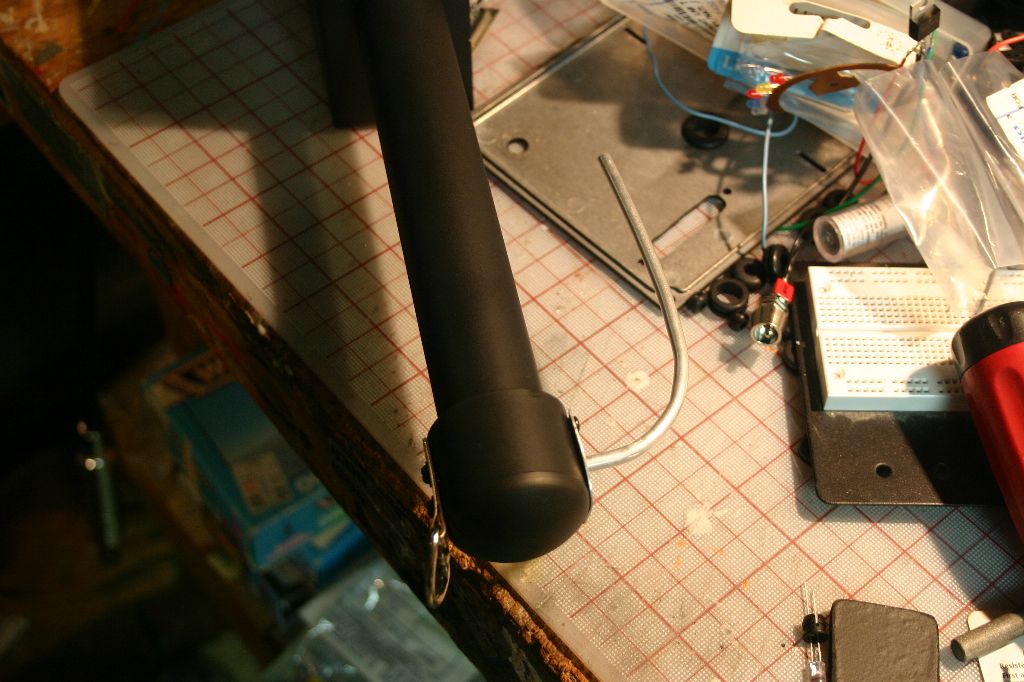
The monopod I found has the correct latch type and the correct groove down its length but is a bit long. There's not much I can do about it as cutting down and re-arranging a monopod is a pain. I think it'll be fine as is. You'll notice that putting up with inaccuracy is a recurring theme in this build, again due to the lack of good reference. The handle section of the scoop needed to be bigger so I found a couple sink tubes at the hardware store that were close in size. I used parts of the plastic one as mounting points to attach the box to the monopod inside of the box and the metal one as the exterior handle. A PVC end cap would be glued onto the end. At that point I did another mock-up to see how things were going.
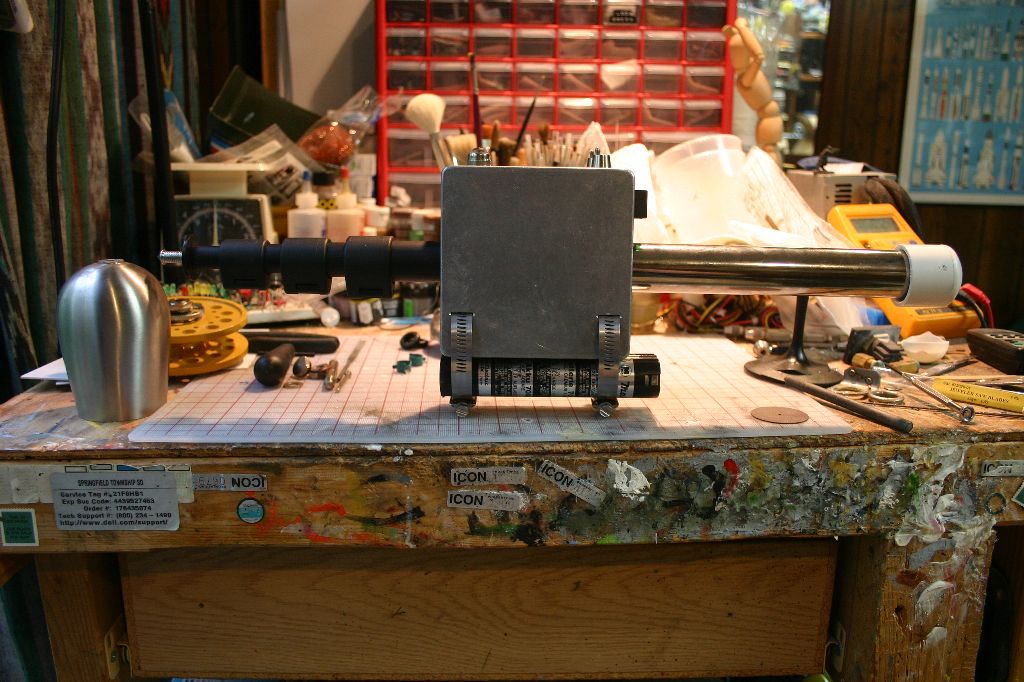

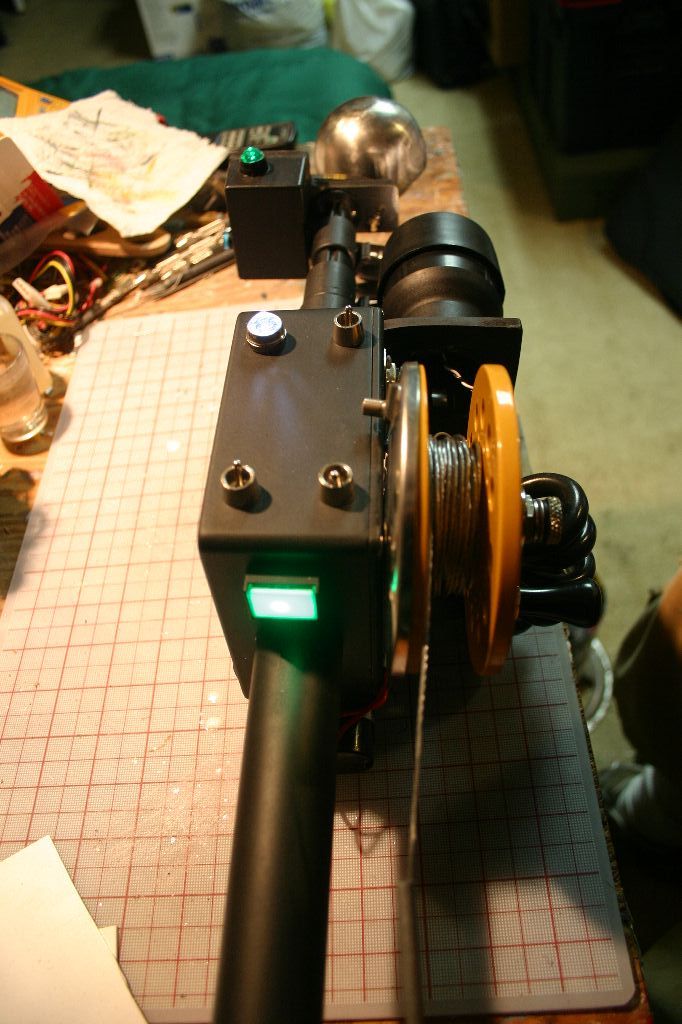
The flashlight was a cheap plastic one I found at Walmart. The neck of the flashlight is too big but the lens is close to the right size so again, I'll live with it. I cut a mounting bracket out of MDF and attached it to the project box with screws. At that point I disassembled everything and painted it with automotive primer and semi-gloss black spraypaint.
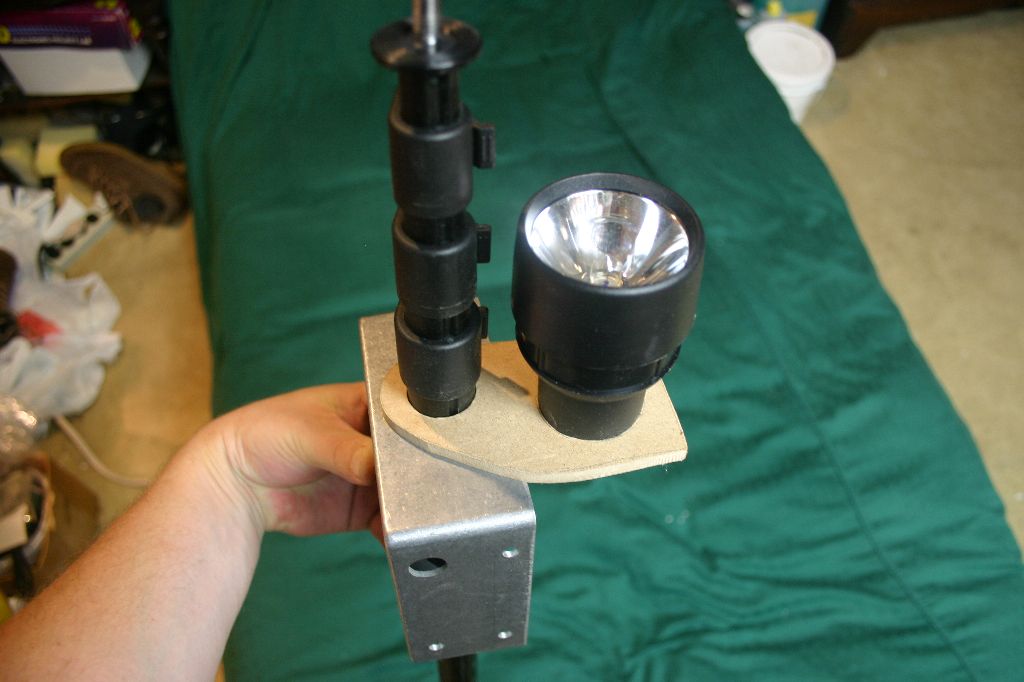

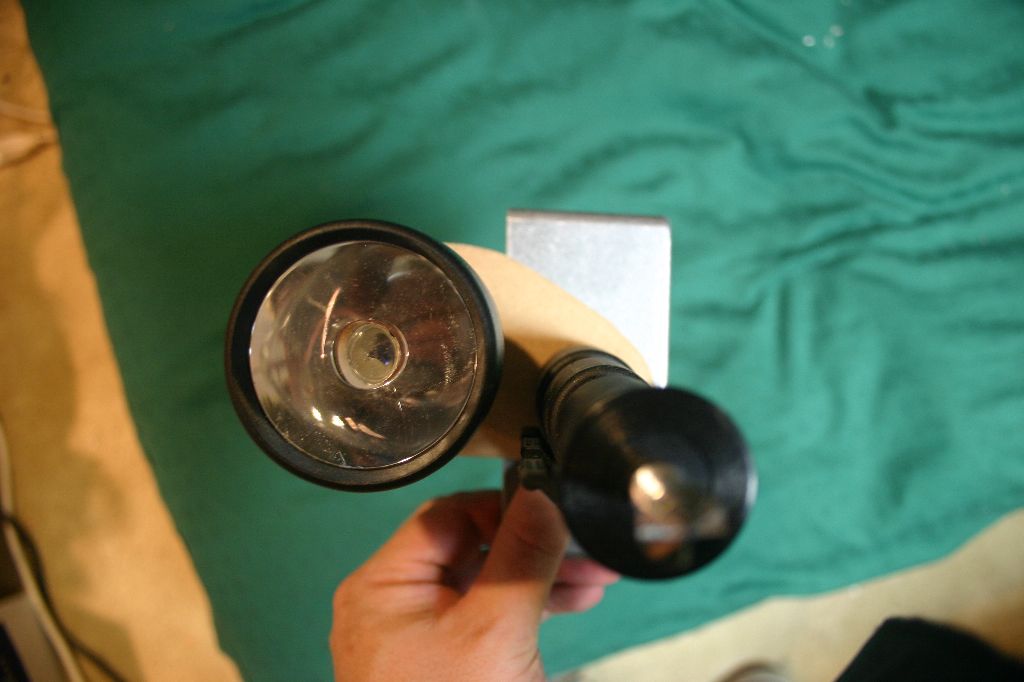

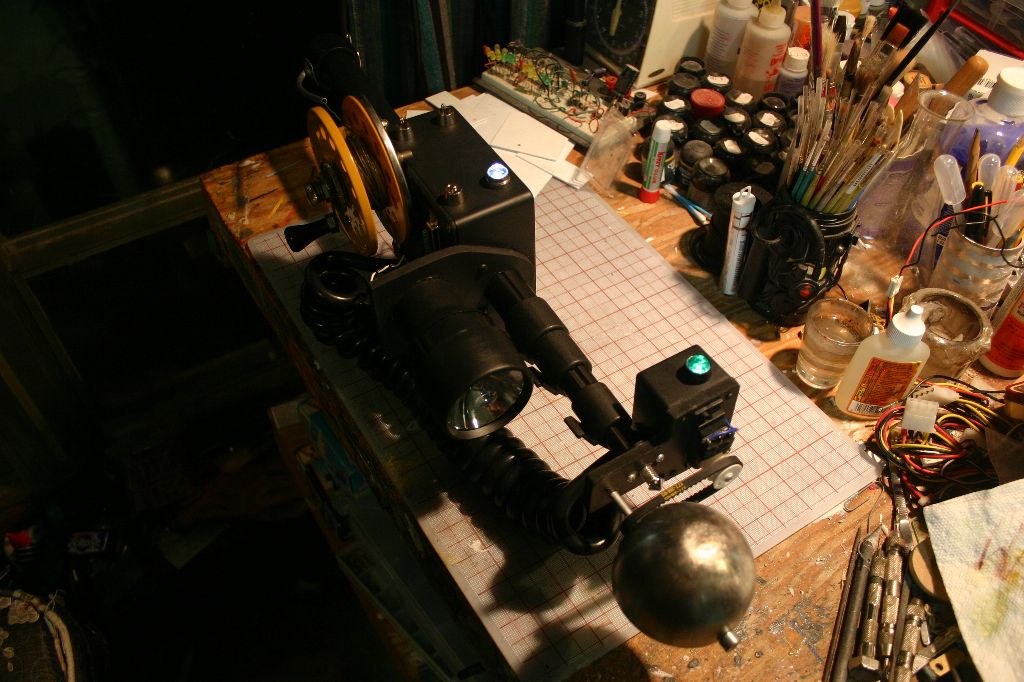
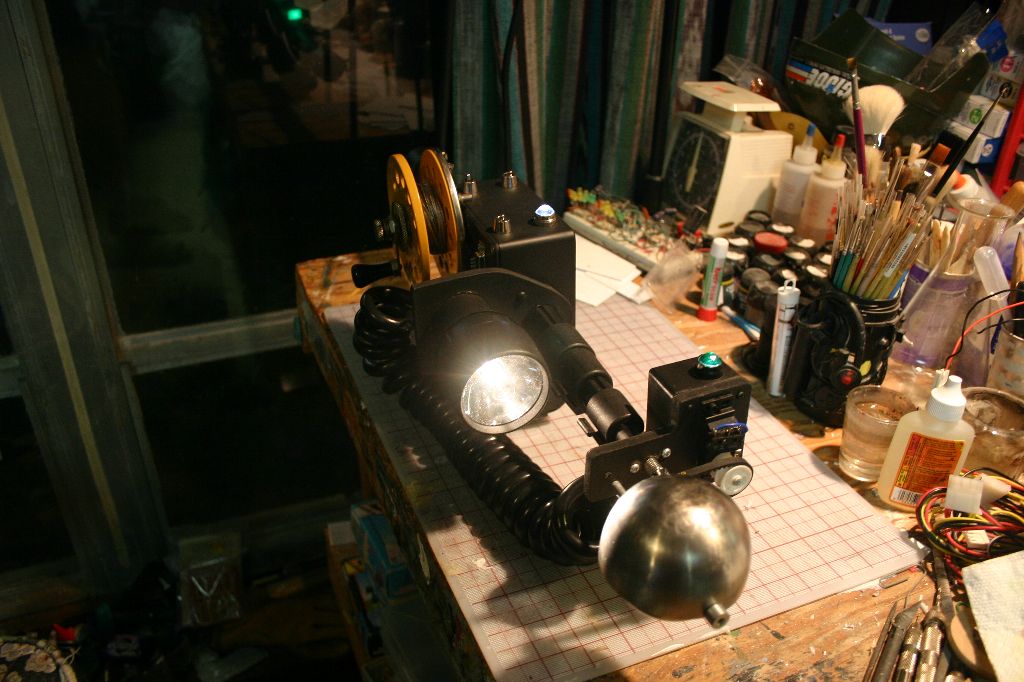
After painting I glued the monopod into the box and put all the switches and lights in. I connected the three indicator lights on one switch, the flashlight with separate batteries on another switch, and the servo on the last switch. I made a servo controller circuit out of a 555 chip. My breadboard was malfunctioning for some reason as after I got the circuit soldered together the motor speed was jittery instead of smooth but again, it's close enough and does actually work. The two Fender lenses were attached with metal clips and epoxy as I couldn't find nuts large enough to screw onto them. LEDs were installed in the lenses by hot gluing them into rubber grommets and then gluing them into the lens. The heavy coiled cable was attached to the boxes through rubber grommets with metal wire collars attached inside to prevent it from sliding out.


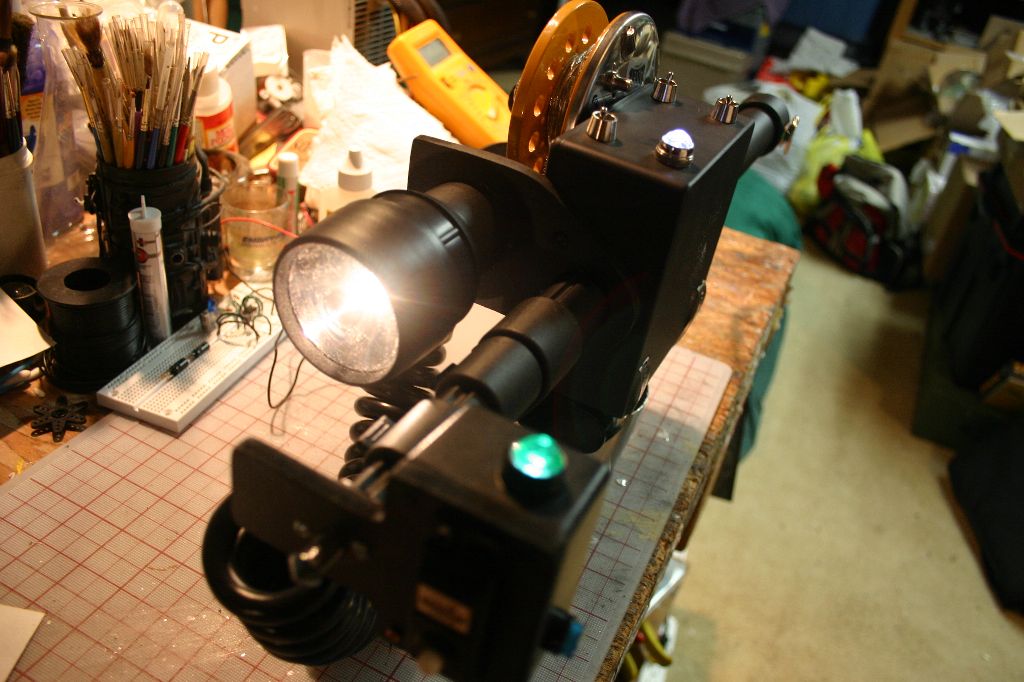
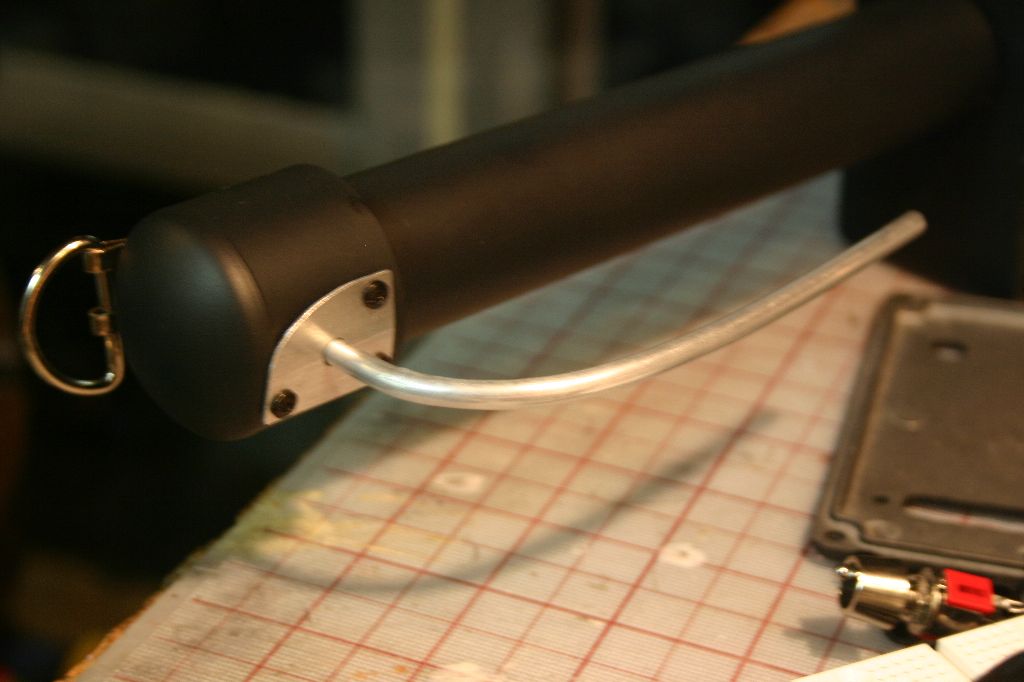
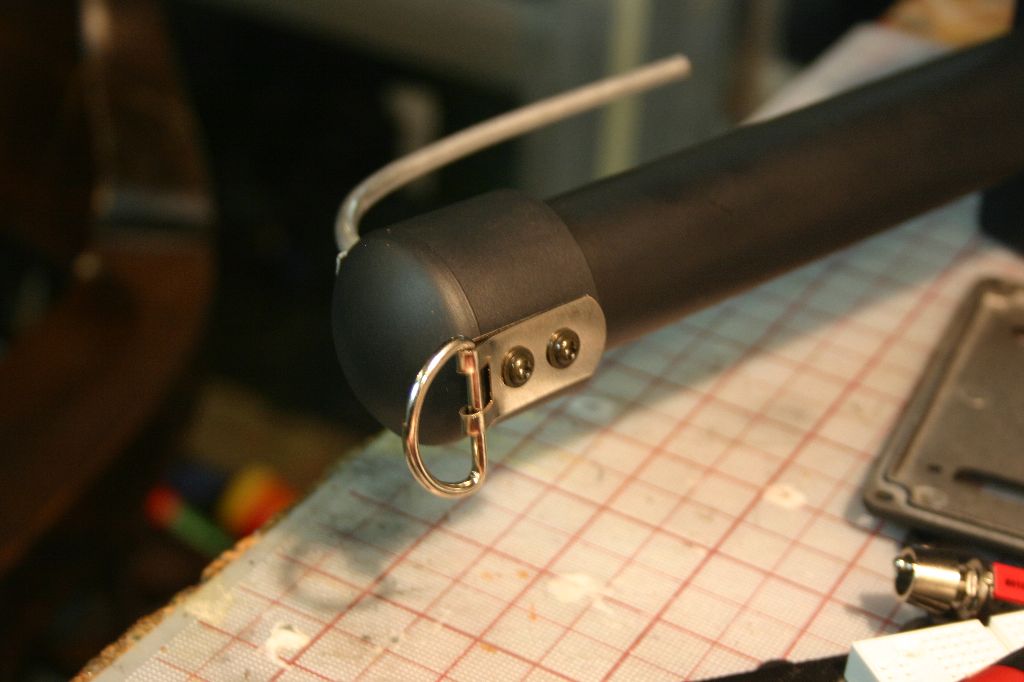
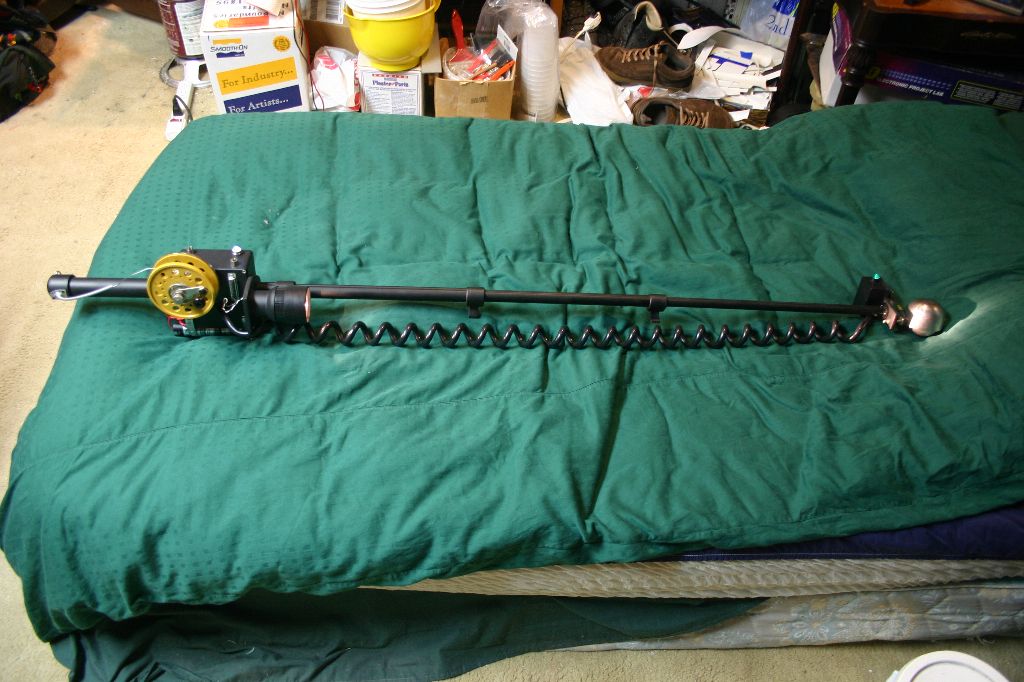
The wire guide was made from a length of 3/16 aluminum tube. I'd rather have used steel tube as after a bit of use this tube snapped and had to be glued back on. I may eventually try soldering it in but for now it's attached, I made a plate from 1/16 aluminum sheet and attached it to the end cap with screws. A d-ring was screwed into the opposite side.

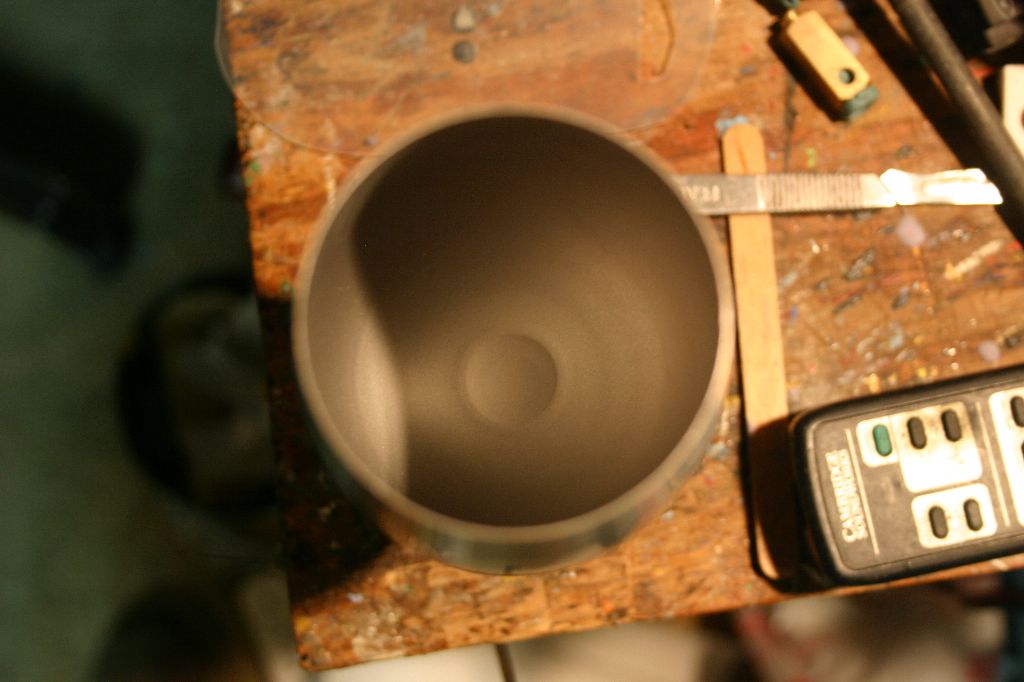
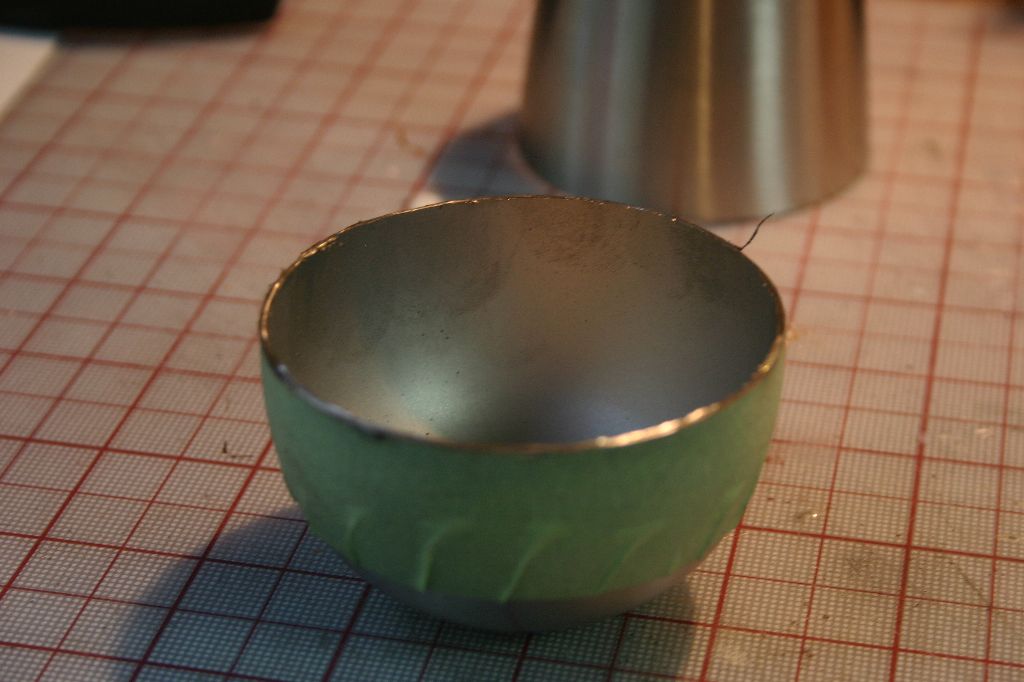
The actual scoop parts were the biggest pain in the ass. The outer scoop is actually more than a hemisphere which makes it tough to find. I looked at all kinds of stuff from ice cream scoops to soup ladles both in stores and online. For the outer scoop I wound up finding a 2.75" diameter stainless steel collapsible travel cup at a hiking supply store, the inner scoop is a 2.5" diameter stainless steel hemisphere I ordered from a metal supply company online. I unscrewed the stem on the cup and ground down the attachment post with my dremel then cut the cup down with a cutting disk. I got a length if 1/8" brass rod to use as a shaft and drilled holes though both scoops.
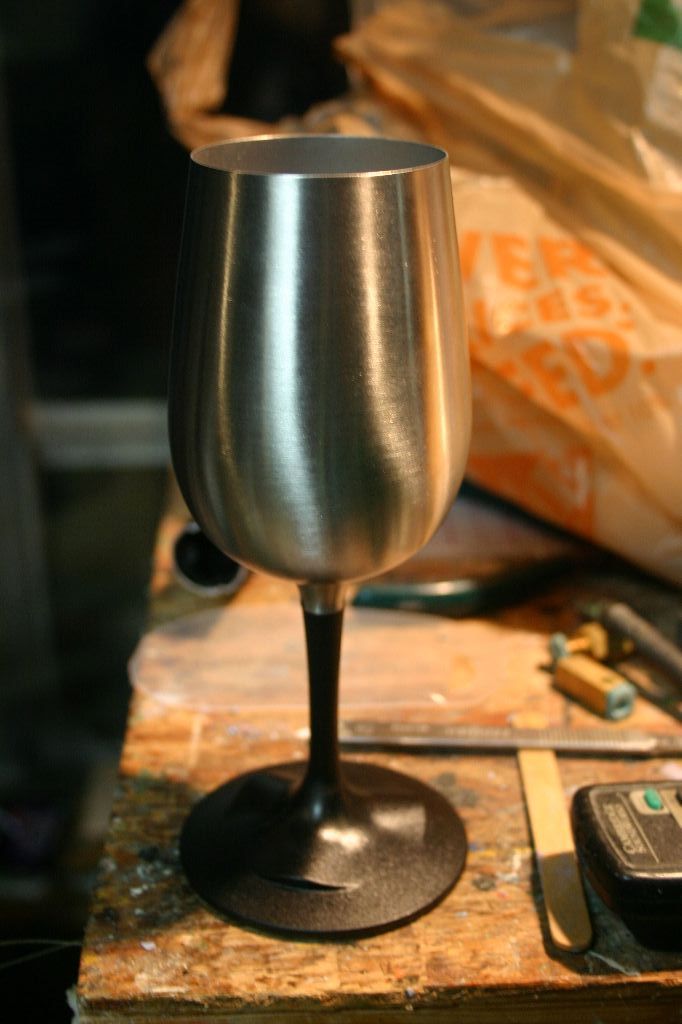
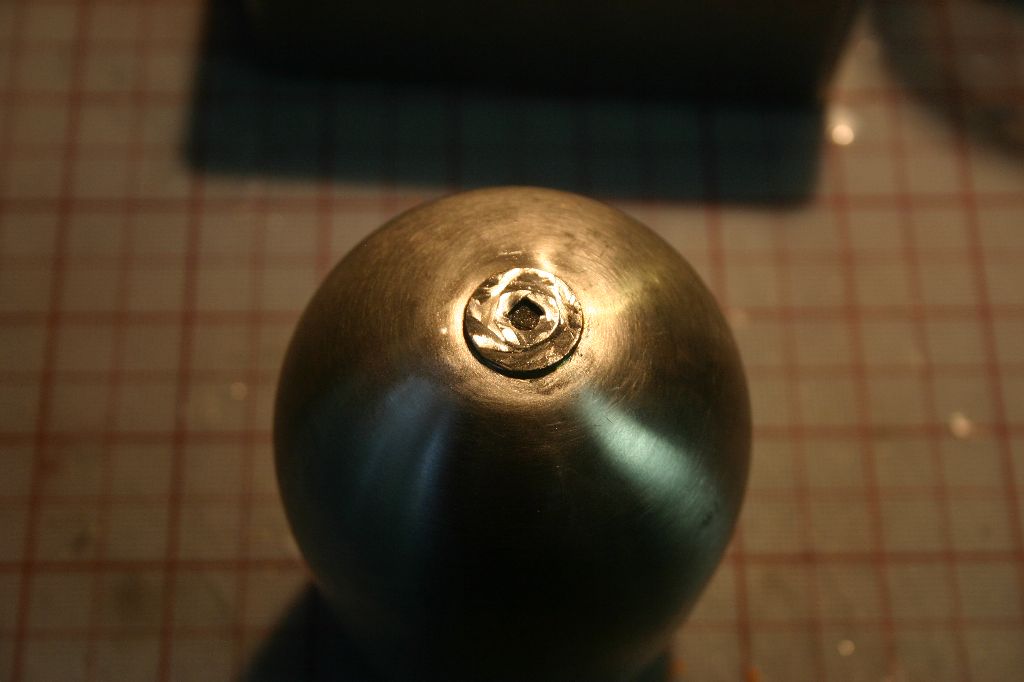


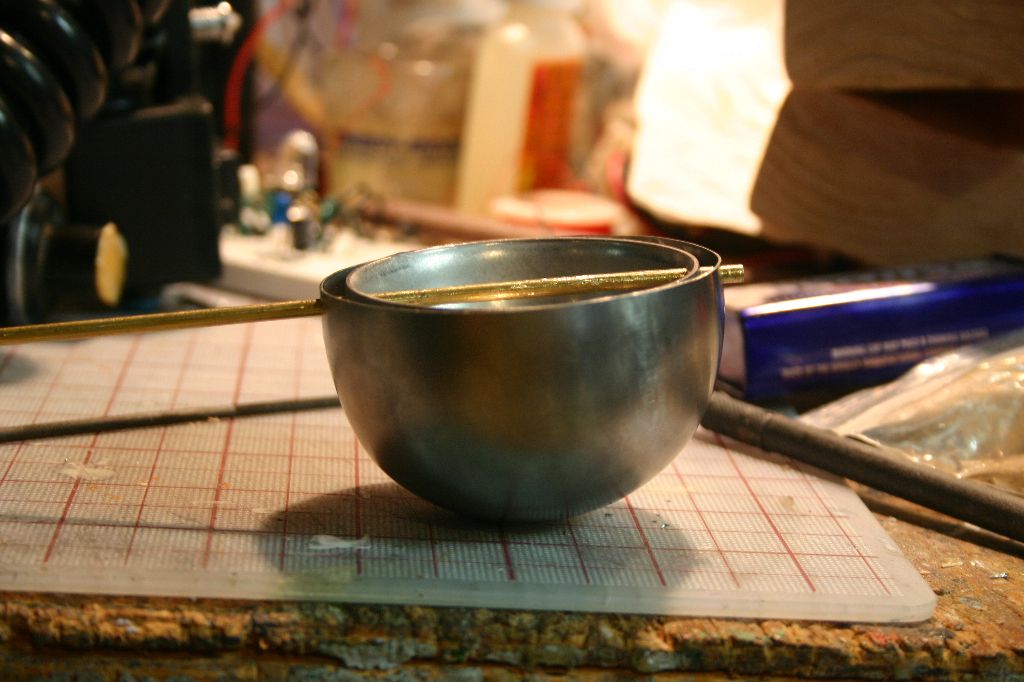
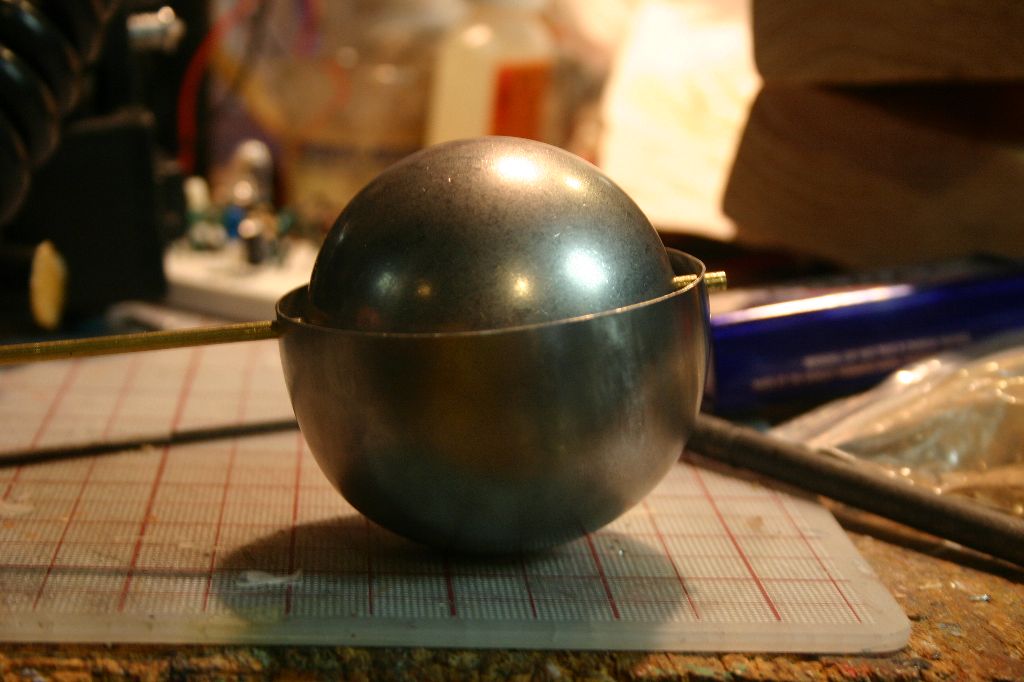
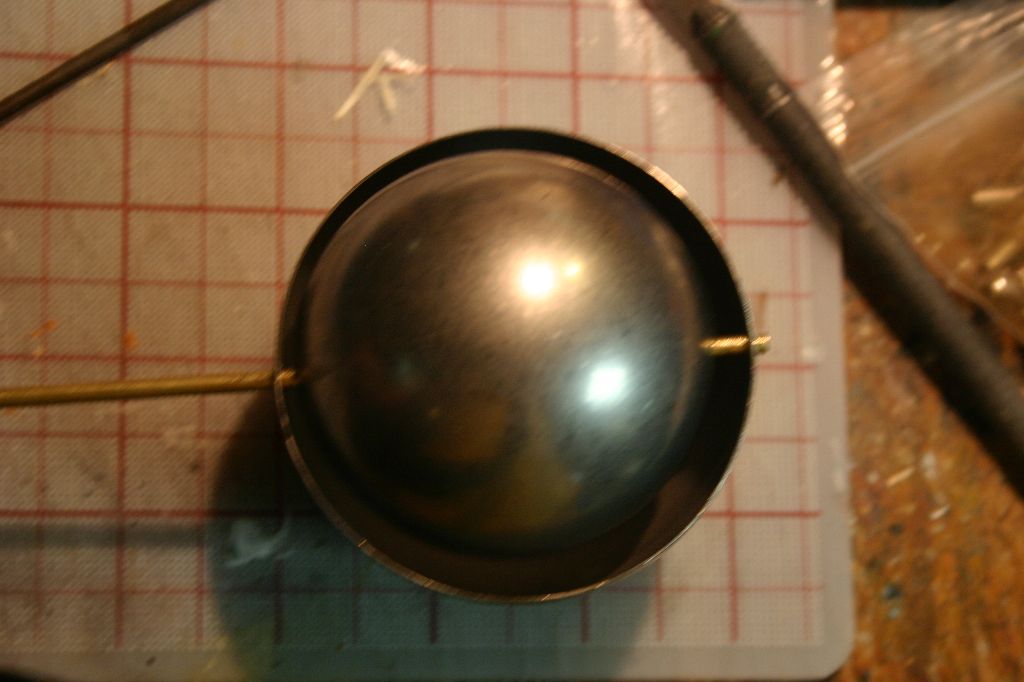
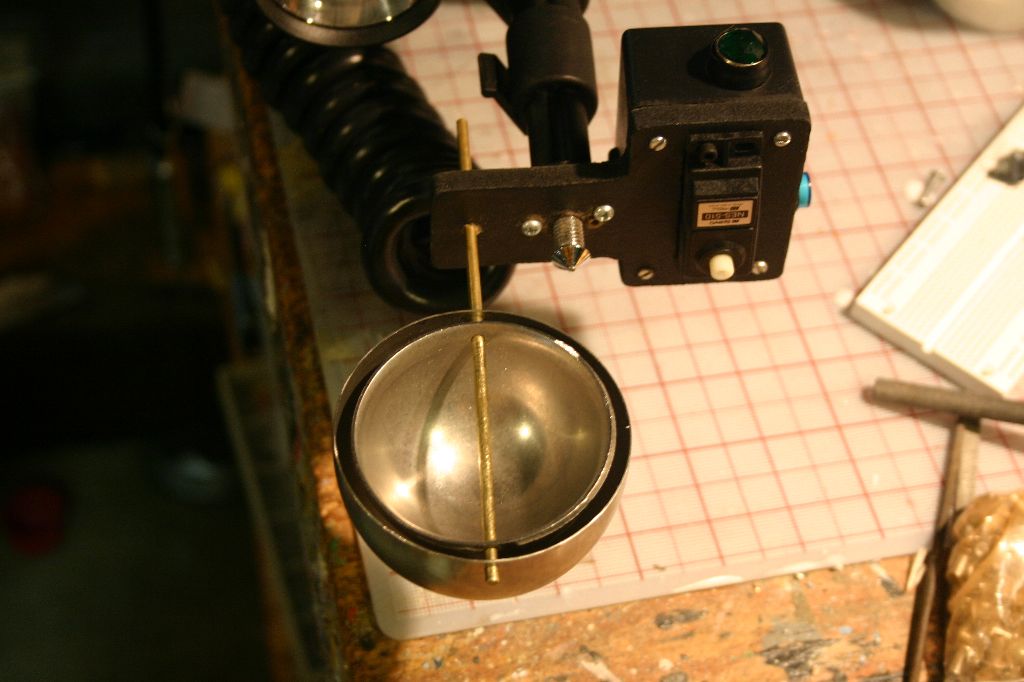
For the pulley system I used parts from some busted printers I had sitting around and a replacement belt for a Bissell vacuum cleaner. One pulley was glued to the outer scoop with JB Weld, the other two were attached to the servo with a screw. The rocker switch was attached over the servo with superglue. The scoop shaft was glued into the mounting bracket and the end of the scoop held on with a steel shaft collar. The inner scoop is glued to the shaft with JB Weld while the outer is left free spinning.
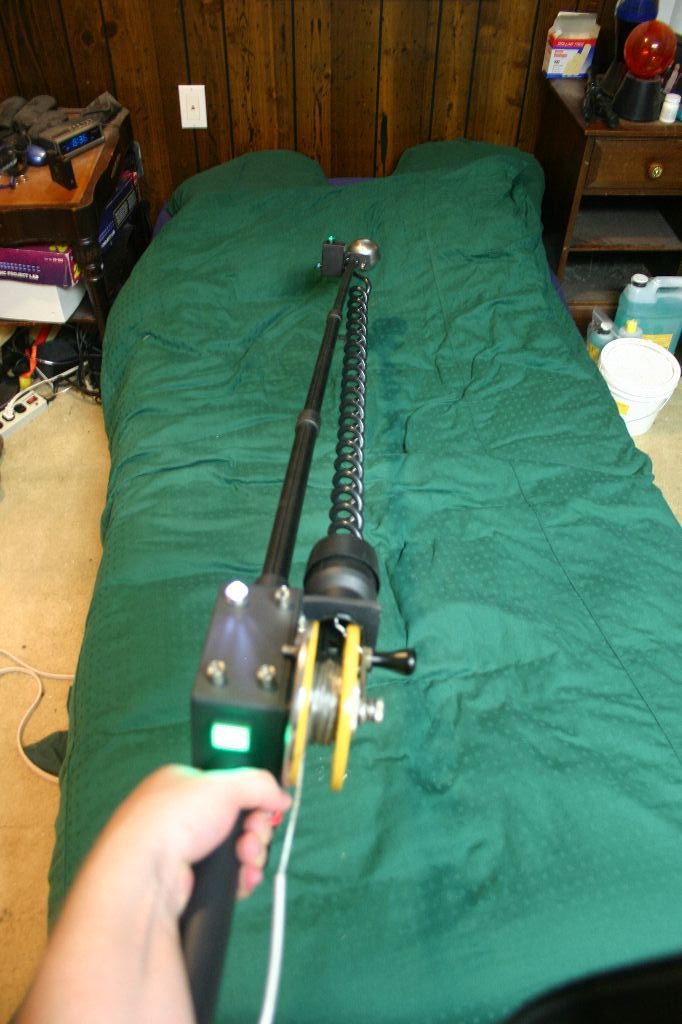
The steel cable is attached to the inner holes on the reel with a cable clamp then run down the inside of the monopod and attached through holes in the end. The weight of the cord makes it a bit hard to reel in unless the end is pointed up or down but it does work. The whole prop weighs just over 5.5 pounds which means carrying it for any length of time won't be fun. Overall I'm happy with how it came out despite the inaccuracies. Hopefully it survives a few times in public.


Tweet
